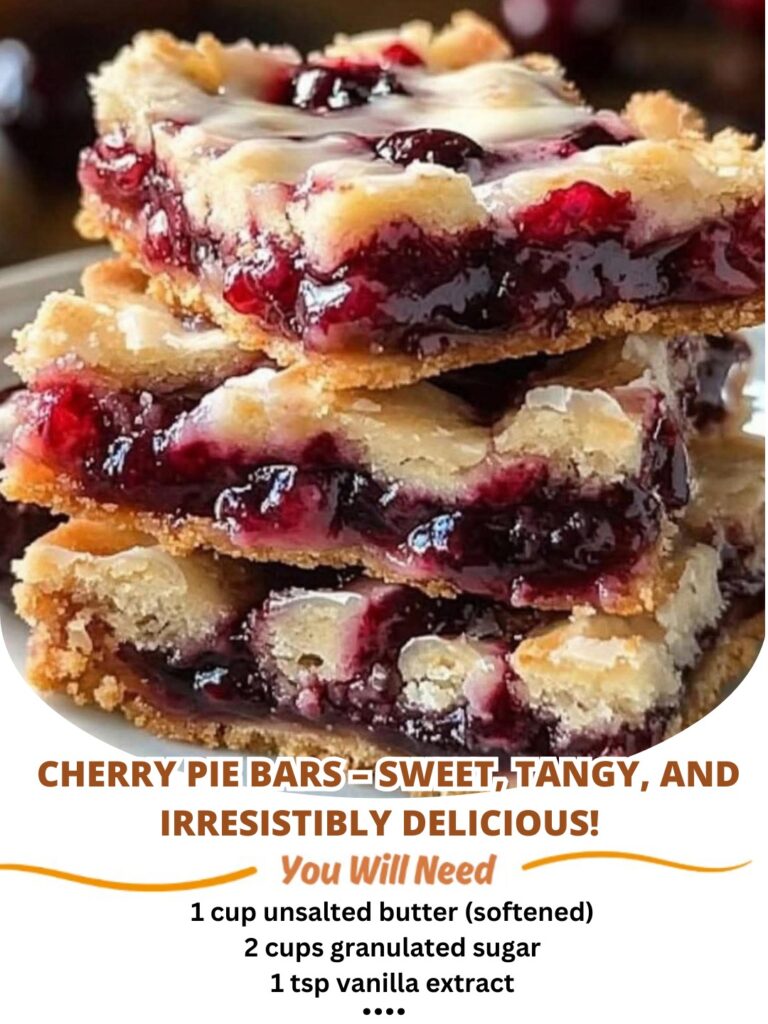
Cherry Pie Bars are everything you love about classic cherry pie, transformed into an easy, sliceable dessert that feels both comforting and special. With a buttery crust, a juicy sweet-tart cherry filling, and a crumbly topping, these bars deliver big flavor without the fuss of rolling pie dough. They are perfect for sharing, easy to transport, and ideal for everything from casual picnics to holiday dessert tables.
What makes Cherry Pie Bars so appealing is their balance. The crust is rich and tender, the filling is bright and fruity, and the topping adds just the right amount of texture. Each bite feels familiar yet exciting. Even better, this recipe is approachable for beginners while still producing bakery-worthy results. If you love cherry pie but want something simpler, these bars are the answer.
I first made Cherry Pie Bars during a busy season when I wanted to bake something homemade but did not have the time or patience for a traditional pie. Cherries have always felt nostalgic to me. Growing up, cherry desserts showed up at family gatherings, potlucks, and summer celebrations. Turning those flavors into bars felt like a practical twist on a classic. Since then, this recipe has become a go-to whenever I want a dessert that feels thoughtful without being complicated.
Ingredients
Equipment
Method
- Preheat oven to 350°F and line baking pan with parchment paper.
- Mix flour, butter, sugar, salt, and vanilla until crumbly. Reserve 1 cup for topping.
- Press remaining mixture firmly into prepared pan to form crust.
- Cook cherries, sugars, cornstarch, lemon juice, and almond extract until thickened.
- Spread cherry filling over crust and sprinkle reserved topping evenly over filling.
- Bake 40–45 minutes until golden and bubbly. Cool completely before slicing.
Nutrition
Notes
Tried this recipe?
Let us know how it was!Why Cherry Pie Bars Are Always a Hit
Classic pie flavor without the extra work
Cherry Pie Bars capture the essence of cherry pie but skip the most intimidating parts. Instead of rolling dough and worrying about crimped edges, you simply press the crust into the pan. This makes the process faster and far less stressful.
Because the crust and topping are made from the same mixture, prep stays simple. You mix once, reserve a portion, and use it twice. This not only saves time but also creates a cohesive flavor throughout the bars. The buttery base supports the filling, while the crumb topping adds a pleasant contrast.
Perfectly balanced sweet and tangy filling
The cherry filling is the heart of these bars. Cherries bring natural sweetness along with a bright tartness that keeps the dessert from feeling heavy. A touch of lemon juice enhances that flavor, while cornstarch thickens the filling so it sets beautifully once baked.
Using both granulated sugar and brown sugar adds depth. Granulated sugar highlights the fruit, while brown sugar adds warmth and richness. Together, they create a filling that tastes full and rounded rather than one-note.
Ingredients That Make These Bars Shine
Choosing the right cherries
Cherry Pie Bars are wonderfully flexible. Fresh cherries offer the brightest flavor when they are in season. Frozen cherries work just as well and are convenient year-round. Canned cherries can also be used, as long as they are well drained.
If your cherries are especially tart, you can slightly increase the sugar. If they are very sweet, reduce it a bit. This flexibility allows you to adjust the recipe based on what you have and your personal taste.
Butter and flour do the heavy lifting
The crust and topping rely on simple ingredients: flour, butter, sugar, and salt. Butter provides richness and flavor, while flour gives structure. Using softened butter creates a slightly denser, cookie-like base. Using cold butter cut into cubes creates a crumblier texture.
Both approaches work well. If you prefer a firmer base, go with softened butter. If you love a crumbly topping that melts into the filling, cold butter is a great choice.
Step-by-Step Tips for Success
Building a sturdy crust
Pressing the crust firmly into the pan is important. This step ensures the bars hold together once sliced. Using parchment paper with overhang makes removal easy and keeps the edges neat.
Baking the crust slightly before adding the filling is optional, but it can help if you prefer an extra-sturdy base. However, even without pre-baking, the crust sets nicely thanks to the thick filling and crumb topping.
Cooking the cherry filling properly
Cooking the filling on the stovetop allows the cornstarch to activate. Stirring constantly prevents scorching and ensures even thickening. Once the mixture bubbles and becomes glossy, it is ready.
Letting the filling cool slightly before spreading it over the crust helps maintain clean layers. This small pause makes assembly easier and results in more defined bars after baking.
Baking and Cooling for Clean Slices
Baking until golden and bubbly
Cherry Pie Bars should bake until the topping is lightly golden and the filling bubbles gently around the edges. This indicates the filling has thickened and the crust is fully baked.
Ovens vary, so keep an eye on the bars during the last few minutes. If the top browns too quickly, loosely cover the pan with foil to prevent overbrowning.
Cooling makes all the difference
Cooling is one of the most important steps. While it is tempting to cut into the bars right away, letting them cool completely allows the filling to set. This results in clean slices and a better texture.
For best results, let the bars cool at room temperature, then refrigerate for an hour before slicing. This extra time makes them easier to handle and enhances the flavor.
Serving and Storage Ideas
How to serve Cherry Pie Bars
Cherry Pie Bars are delicious on their own, but they also pair beautifully with simple additions. A dusting of powdered sugar adds a classic touch. A scoop of vanilla ice cream turns them into a more indulgent dessert.
They work well served warm or chilled. Warm bars feel comforting and cozy, while chilled bars are refreshing and firm, making them perfect for outdoor gatherings.
Storing and making ahead
These bars store exceptionally well. Kept in an airtight container, they last up to three days at room temperature or up to a week in the refrigerator. They also freeze beautifully for longer storage.
To freeze, wrap individual bars tightly and store them in a freezer-safe container. Thaw in the refrigerator or at room temperature before serving.
Frequently Asked Questions
Can I use other fruits instead of cherries?
Yes, blueberries, raspberries, or mixed berries work well with the same method.
Do I need almond extract?
No, it is optional. However, it adds a subtle flavor that pairs wonderfully with cherries.
Can I double the recipe?
Absolutely. Use a larger pan and adjust baking time as needed.
Why is my filling runny?
The bars may need more cooling time, or the filling may not have cooked long enough to activate the cornstarch.
Can I make these gluten-free?
Yes, substitute a 1:1 gluten-free flour blend designed for baking.
Conclusion
Cherry Pie Bars are proof that classic desserts can be both simple and impressive. They deliver all the flavor of cherry pie in a form that is easier to make, easier to serve, and easier to share. With a buttery crust, a vibrant cherry filling, and a crumbly topping, these bars are hard to resist.
Whether you bake them for a holiday, a picnic, or a quiet weekend treat, they are sure to disappear quickly. Once you try Cherry Pie Bars, they are likely to become a favorite recipe you return to again and again.


Leave a Reply