Mastering Seeded Artisan Bread Dough is one of the most rewarding experiences in home baking. From the moment the dough comes together to the sound of a crackling crust cooling on the counter, this rustic loaf delivers both comfort and pride. Mastering Seeded Artisan Bread Dough allows you to create bakery-style bread at home, with a deeply flavorful crust, an airy crumb, and the nutty richness of mixed seeds in every bite.
This seeded loaf is perfect for everyday use. It works beautifully for toast, sandwiches, and soups, yet it feels special enough for weekend meals or sharing with friends. Best of all, mastering seeded artisan bread dough does not require complicated techniques or special equipment. With patience, simple ingredients, and a little practice, you can bake a loaf that looks and tastes like it came from an artisan bakery.
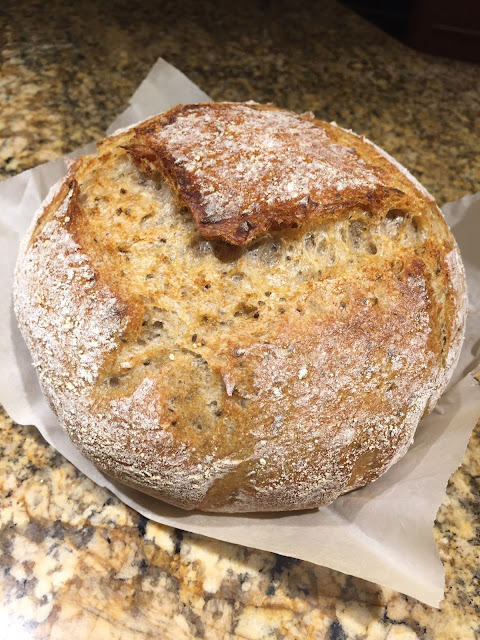
The first time I worked with seeded artisan bread dough, I remember being surprised by how alive the dough felt. As it rested, it slowly expanded, developing flavor and structure on its own. When the loaf finally came out of the oven, golden and fragrant, it instantly became a household favorite. Since then, this dough has been my go-to whenever I want dependable, rustic bread.
Ingredients
Equipment
Method
- Combine flour, salt, sugar, and yeast in a bowl. Add water and olive oil and mix into a shaggy dough.
- Fold in the seed mix until evenly distributed.
- Cover and let the dough rise until doubled in size.
- Shape dough into a round loaf and allow a second rise.
- Bake in a hot oven until crusty and golden. Cool completely before slicing.
Nutrition
Notes
Tried this recipe?
Let us know how it was!Understanding Seeded Artisan Bread Dough
What Makes Artisan Bread Different
Artisan bread focuses on time and technique rather than shortcuts. Instead of heavy kneading or excessive yeast, the dough relies on hydration, rest, and gentle handling. This method allows gluten to develop naturally, resulting in a chewy interior and crisp crust.
When you master seeded artisan bread dough, you learn to trust the process. The dough does most of the work for you, slowly developing flavor as it rises.
Why Seeds Elevate the Loaf
Seeds add texture, nutrition, and depth. Sunflower seeds bring nuttiness, sesame seeds add toastiness, and flax and chia contribute subtle earthiness. Together, they create layers of flavor that make every slice interesting.
In seeded artisan bread dough, the seeds also help retain moisture, keeping the loaf fresh longer.
Ingredients That Build Flavor and Structure
The Dough Base
Bread flour forms the backbone of this recipe. Its higher protein content supports strong gluten development, which is essential for structure and rise.
Salt controls fermentation and enhances flavor, while sugar provides a small boost to yeast activity. Instant yeast ensures consistent results without complicated steps.
Warm water hydrates the flour and activates the yeast, while olive oil adds subtle richness and softness.
The Seed Mix
A balanced seed mix creates contrast and complexity. Sunflower, sesame, flax, poppy, and chia seeds work together without overpowering the bread. Optional caraway seeds add a mild aromatic note that pairs beautifully with savory toppings.
You can customize the mix, but keeping a balance of sizes and flavors ensures the dough remains workable.
How to Make Seeded Artisan Bread Dough
Step One: Mix the Dough
In a large bowl, combine bread flour, salt, sugar, and yeast. Stir to distribute evenly. Add warm water and olive oil, then mix until a shaggy dough forms.
Fold in the seed mix gently, ensuring even distribution without overworking the dough.
Step Two: First Rise
Cover the bowl and let the dough rise in a warm place until doubled in size. This slow rise allows flavor to develop naturally.
During this time, the dough becomes elastic and airy.
Step Three: Shape the Dough
Turn the dough onto a lightly floured surface. Shape it gently into a round loaf, being careful not to deflate it completely.
Place the dough seam-side down on parchment paper or a floured surface.
Step Four: Second Rise
Cover and let the dough rest again. This second rise improves structure and ensures a light crumb.
While the dough rests, preheat the oven with a baking vessel inside to create steam.
Step Five: Bake to Perfection
Transfer the dough into the hot vessel. Bake until the crust turns deep golden brown and sounds hollow when tapped.
Let the loaf cool completely before slicing to set the crumb.
Tips for Mastering Seeded Artisan Bread Dough
Use warm, not hot, water to avoid damaging the yeast. Handle the dough gently to preserve air bubbles.
For extra flavor, lightly toast the seeds before adding them to the dough. This step enhances aroma and depth.
Let the bread cool fully before cutting to avoid a gummy texture.
Serving Ideas for Seeded Artisan Bread
This bread pairs well with butter, honey, or jam. It also works beautifully with soups, stews, and salads.
For sandwiches, its sturdy structure holds fillings without falling apart.
Storage and Freshness
Store seeded artisan bread at room temperature in a paper bag or wrapped in a cloth. It stays fresh for several days.
You can also freeze slices for longer storage.
Frequently Asked Questions
Can I use all-purpose flour instead of bread flour?
Yes, but bread flour gives better structure.
Can I add other seeds?
Yes, pumpkin seeds work well.
Do I need a Dutch oven?
It helps but is not required.
Can I make the dough ahead?
Yes, overnight fermentation works well.
Why is my bread dense?
Under-proofing or over-handling may be the cause.
Conclusion
Mastering Seeded Artisan Bread Dough is about patience, simplicity, and trust in the process. With a few basic ingredients and thoughtful technique, you can bake a rustic loaf that rivals bakery bread. Once you experience the satisfaction of pulling a perfectly seeded loaf from your oven, this recipe will become a staple in your kitchen.


Leave a Reply