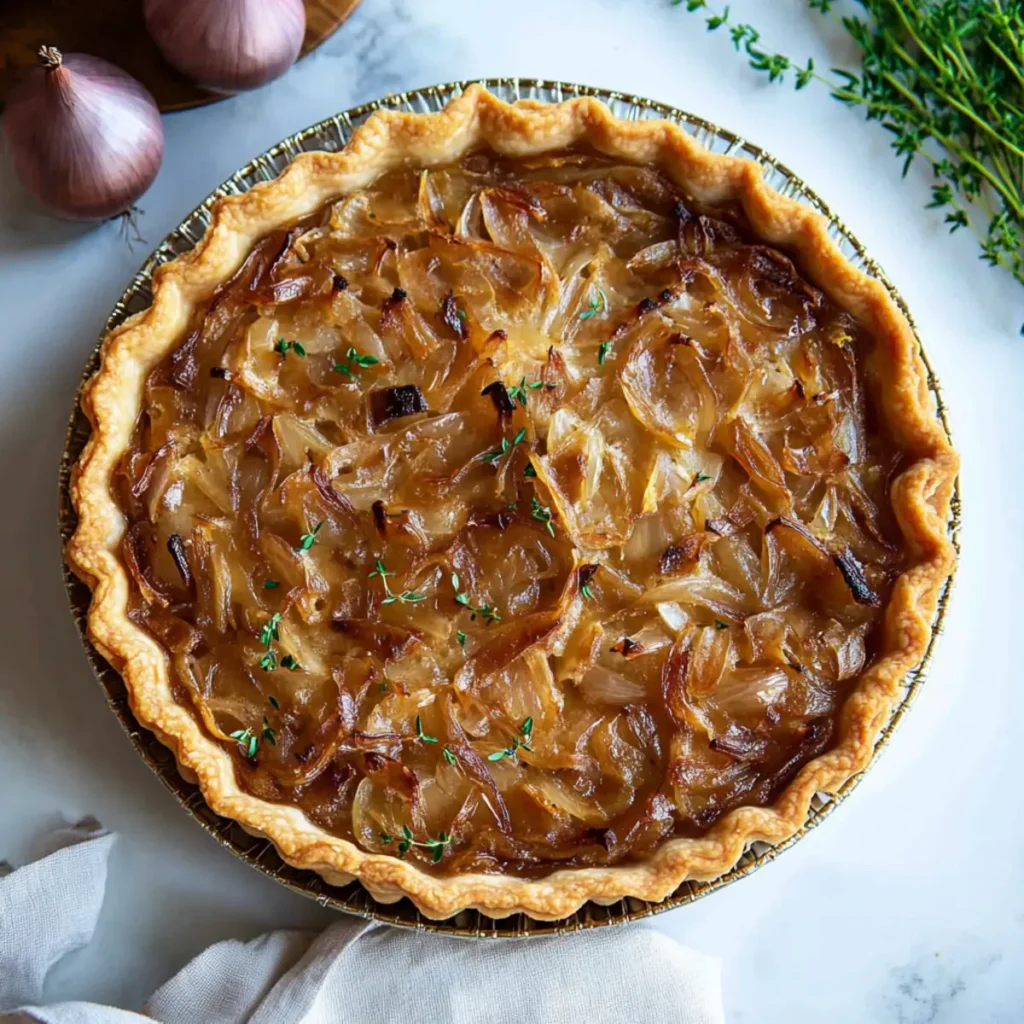
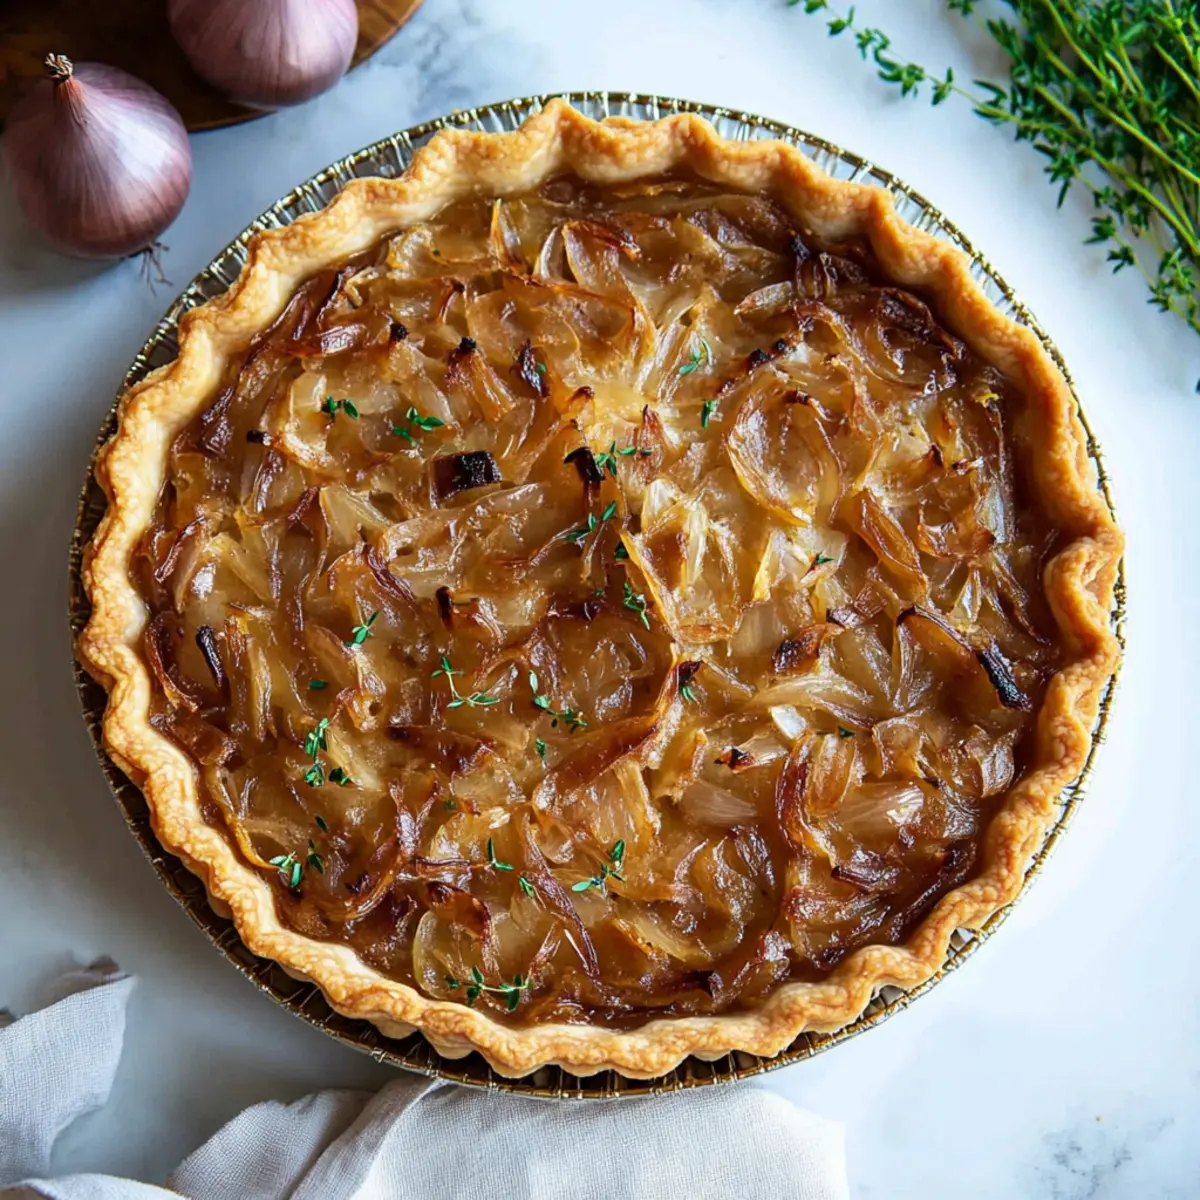
The moment the sweet aroma of caramelized onions fills the kitchen, you know something special is about to unfold. I stumbled upon this Savory Caramelized Onion Tart while searching for a dish that could effortlessly elevate a casual brunch into a memorable meal. With its delightful combination of creamy custard, crispy bacon, and fragrant fresh herbs, this tart is the perfect answer to those nights when takeout just won't cut it.
Picture sinking your fork into a golden-brown, flaky crust, only to be met with a luscious filling that sings of caramelized sweetness and savory goodness. It's versatile enough to shine as a main dish for dinner or be the star of your next gathering. Whether you're looking to impress guests or simply treat yourself to something extraordinary, this tart can do it all. Trust me; once you try this recipe, you'll be adding caramelized onion tart to your regular cooking rotation!
Why is Caramelized Onion Tart a Must-Try?
Flavor explosion: The harmonious blend of sweet caramelized onions and crispy bacon creates a mouthwatering experience that will leave your taste buds dancing.
Wholesome ingredients: Featuring fresh herbs and a creamy custard, this tart is packed with delightful flavors and textures that elevate your meals.
Effortless preparation: Cooking this dish is easy and rewarding, perfect for both beginner chefs and seasoned pros alike.
Versatile delight: Ideal for brunch, lunch, or dinner, it fits any occasion, making meal planning a breeze.
Crowd pleaser: Guests will rave over this standout dish, ensuring you earn all the compliments when you showcase your culinary skills! You can also check out other exciting recipes to elevate your cooking game.
Caramelized Onion Tart Ingredients
For the Crust
• Unbaked Refrigerated Pie Crust – Provides structure and texture; Pillsbury brand recommended for convenience.
For the Filling
• Bacon – Adds a savory, salty flavor and crunch; Use not thick-cut bacon for best results.
• Butter – Enhances flavor while sautéing onions.
• Sweet Yellow Onions – The star ingredient, providing sweetness and depth; About 2 medium-sized onions needed, halved and thinly sliced.
• Kosher Salt – Enhances flavors, divided into two parts for cooking and seasoning.
• Large Eggs – Sets the custard, contributing to the tart's creamy texture.
• Sour Cream (or Crème Fraîche) – Adds creaminess and tang; Can be substituted with Greek yogurt.
• Chopped Fresh Sage – Imparts a fragrant, earthy element to the tart.
• Chopped Fresh Thyme – Brings in a fresh, herbal note, enhancing overall flavor.
• Freshly Ground Black Pepper – Provides seasoning and a hint of heat.
• Ground Nutmeg – Enhances the flavor profile; a little goes a long way in this caramelized onion tart.
How to Make Caramelized Onion Tart
-
Preheat your oven to 400°F (200°C). This prepares the perfect environment for our tart to bake to perfection.
-
Cook the bacon in a skillet over medium-high heat until it's perfectly crisp. Once cooked, drain it on paper towels and set aside to cool.
-
Melt butter in the same skillet with the delicious bacon drippings. Add the sweet yellow onions and ¼ teaspoon of salt; sauté for about 18 minutes—cover for the first 5, then uncover for another 10—until the onions are soft and golden brown.
-
Cool the caramelized onions slightly as you prepare the tart crust. This prevents a soggy base.
-
Prepare your tart pan by spraying it with nonstick cooking spray. Place the pie crust in the pan, gently pressing it into shape, and prick the bottom with a fork to avoid bubbling.
-
Parbake the crust with foil and weights for 14-16 minutes until dry and just starting to turn golden. Carefully remove the foil and weights after baking.
-
Whisk together the large eggs and sour cream in a medium bowl until smooth. Then, mix in the crisped bacon, caramelized onions, fresh herbs, the remaining salt, pepper, and nutmeg for a flavorful filling.
-
Pour the filling into your prepared crust and bake for 25-30 minutes. It’s done when it's set and golden-brown on top!
-
Cool the tart for about 10-15 minutes. Slice and then serve warm or at room temperature to allow all those wonderful flavors to meld beautifully.
Optional: Garnish with extra fresh herbs for a pop of color and flavor.
Exact quantities are listed in the recipe card below.
How to Store and Freeze Caramelized Onion Tart
Fridge: Store the tart in an airtight container or tightly wrapped in plastic wrap for up to 3 days to maintain freshness and flavor.
Freezer: To freeze, wrap the unbaked tart tightly in plastic wrap, then in aluminum foil, and store for up to 2 months. This allows for quick baking later!
Reheating: For the best texture, reheat leftovers by covering the tart with aluminum foil and baking in a preheated oven at 350°F (175°C) until heated through.
Serving Tip: Enjoy the Caramelized Onion Tart warm or at room temperature, allowing the rich flavors to shine!
What to Serve with Caramelized Onion Tart?
When you're about to savor the delightful layers of a caramelized onion tart, think about side dishes and beverages that will harmonize beautifully with its rich flavors.
- Lemon Parmesan Salad: A crisp, tangy salad that cuts through the tart's richness, making each bite refreshing and vibrant.
- Garlic Herb Roasted Potatoes: These golden, crispy potatoes add a satisfying crunch and a savory flavor that complements the sweetness of the tart.
- Steamed Asparagus with Lemon: Light and bright, the tender green spears bring a fresh, earthy balance to the creamy layers of the tart.
- Creamy Coleslaw: The cool, crunchy cabbage and tangy dressing provide a perfect contrast to the warm, savory tart. It's a delightful textural interplay.
- Tomato Basil Soup: This classic pairing enhances the dish's savory notes while offering a comforting warmth that's simply irresistible.
- Red Wine: Choose a smooth Cabernet Sauvignon or a light Pinot Noir to elevate your dining experience, enhancing both the tart and the conversation.
- Lemon Sorbet: As a light dessert, this refreshing palate cleanser will invigorate your senses after indulging in the creamy tart.
- Sparkling Water with Mint: A sparkling sip brightens the table and refreshes each palate before and after enjoying the meal.
Caramelized Onion Tart Variations
Feel free to explore these delightful twists that will add even more personality to your caramelized onion tart.
-
Sausage Swap: Substitute bacon with cooked sausage or ham for a hearty touch. The savory flavors of sausage pair wonderfully with the sweet onions.
-
Cheese Delight: Experiment with different cheeses like cheddar or Gruyère. Each variety contributes its unique richness, enhancing your tart's flavor profile in delightful ways.
-
Shallots Instead: For a milder taste, replace sweet onions with shallots. This simple swap adds a sophisticated touch to your tart without overpowering the other flavors.
-
Herb Medley: Incorporate a mix of fresh herbs like rosemary or chives for an aromatic twist. The fragrant notes elevate the dish, making it perfect for special occasions.
-
Spice it Up: Add a pinch of red pepper flakes for a hint of heat. Spicing things up can change the entire dynamic of the tart.
-
Veggie Version: Make it vegetarian by omitting bacon and adding sautéed spinach or mushrooms for an earthy and satisfying filling. Your veggie-loving friends will thank you!
-
Nutty Crust: For added crunch, mix finely chopped nuts like walnuts or pecans into your pie crust. This creates a beautiful contrast to the creamy filling of the tart.
-
Sweet Touch: Include a tablespoon of balsamic vinegar in the onion mixture for a sweet yet tangy flavor boost. It adds depth that's simply irresistible!
Make Ahead Options
These Caramelized Onion Tart preparations are perfect for busy home cooks looking to save time. To make your meal prep easier, you can caramelize the onions and cook the bacon up to 3 days in advance. Simply store them in airtight containers in the refrigerator. Additionally, the unbaked pie crust can be prepped up to 24 hours ahead; just keep it wrapped tightly in plastic wrap to prevent drying. When you're ready to serve, assemble the tart by mixing the cooled onions and bacon with the other filling ingredients, pour it into the crust, and bake as instructed. Rest assured, this tart will be just as delicious!
Helpful Tricks for Caramelized Onion Tart
-
Nonstick Pan: Use a nonstick tart pan with a removable bottom for easy serving, avoiding the frustration of stuck crusts.
-
Onion Cooking Tips: Stir the onions regularly and maintain a moderate heat to avoid burning. This ensures they caramelize beautifully, enhancing your tart's flavor.
-
Prepare Ahead: Make the tart in advance and freeze it unbaked. This allows for a quick bake when you need it, perfect for unexpected guests or busy nights.
-
Reheating Technique: To reheat leftover Caramelized Onion Tart, cover it with aluminum foil to maintain moisture. Bake until heated through, preserving the flaky crust and creamy filling.
-
Egg Mixture: Make sure to whisk the eggs and sour cream thoroughly before adding other ingredients. This creates a smooth filling for an even texture in your caramelized onion tart.
Caramelized Onion Tart Recipe FAQs
How do I choose the right onions for my caramelized onion tart?
Absolutely! For the best flavor, opt for sweet yellow onions. They have a natural sweetness that enhances the dish beautifully. Look for onions that are firm and have a smooth, dry skin, avoiding any with dark spots or blemishes.
What’s the best way to store leftover caramelized onion tart?
Store your leftovers in an airtight container or tightly wrapped in plastic wrap in the fridge for up to 3 days. This will keep your tart fresh and flavorful. When ready to enjoy, simply slice and reheat!
Can I freeze my caramelized onion tart?
Very! To freeze, wrap the unbaked tart in plastic wrap and then in aluminum foil. It can be stored in the freezer for up to 2 months. When you're ready to bake it, remove the plastic wrap and foil, and bake from frozen, adding a few extra minutes to the baking time for best results.
What should I do if my tart crust is soggy after baking?
If your crust turns out soggy, it’s crucial to ensure you parbake it properly. Make sure to prick the bottom with a fork to allow steam to escape and use pie weights or dried beans covered with foil during parbaking. If you find yourself with a soggy base, try baking it a bit longer on a lower temperature to help set the crust without burning the filling.
Is this caramelized onion tart suitable for people with allergies?
It’s important to be careful! This tart contains common allergens like eggs and dairy. For a dairy-free option, substitute sour cream with a plant-based yogurt, and be sure to use a crust that is free from milk products. Additionally, if you’re serving this to guests, always check for any specific allergies to bacon or eggs.
How do I know when my caramelized onion tart is done baking?
Enjoy baking! Your tart is ready when the filling is set and has turned a lovely golden brown color on top, usually around 25-30 minutes of baking. A toothpick inserted in the center should come out clean, indicating the custard has set beautifully. Allow it to cool for about 10-15 minutes before slicing, giving the filling time to settle.
Irresistibly Savory Caramelized Onion Tart with Bacon Bliss
Ingredients
Equipment
Method
- Preheat your oven to 400°F (200°C).
- Cook the bacon in a skillet over medium-high heat until it's perfectly crisp. Once cooked, drain it on paper towels and set aside to cool.
- Melt butter in the same skillet with the bacon drippings. Add the sweet yellow onions and ¼ teaspoon of salt; sauté for about 18 minutes—cover for the first 5, then uncover for another 10—until the onions are soft and golden brown.
- Cool the caramelized onions slightly as you prepare the tart crust.
- Prepare your tart pan by spraying it with nonstick cooking spray. Place the pie crust in the pan, gently pressing it into shape, and prick the bottom with a fork to avoid bubbling.
- Parbake the crust with foil and weights for 14-16 minutes until dry and just starting to turn golden. Carefully remove the foil and weights after baking.
- Whisk together the large eggs and sour cream in a medium bowl until smooth. Then, mix in the crisped bacon, caramelized onions, fresh herbs, the remaining salt, pepper, and nutmeg for a flavorful filling.
- Pour the filling into your prepared crust and bake for 25-30 minutes until set and golden-brown.
- Cool the tart for about 10-15 minutes. Slice and then serve warm or at room temperature.
Leave a Reply