
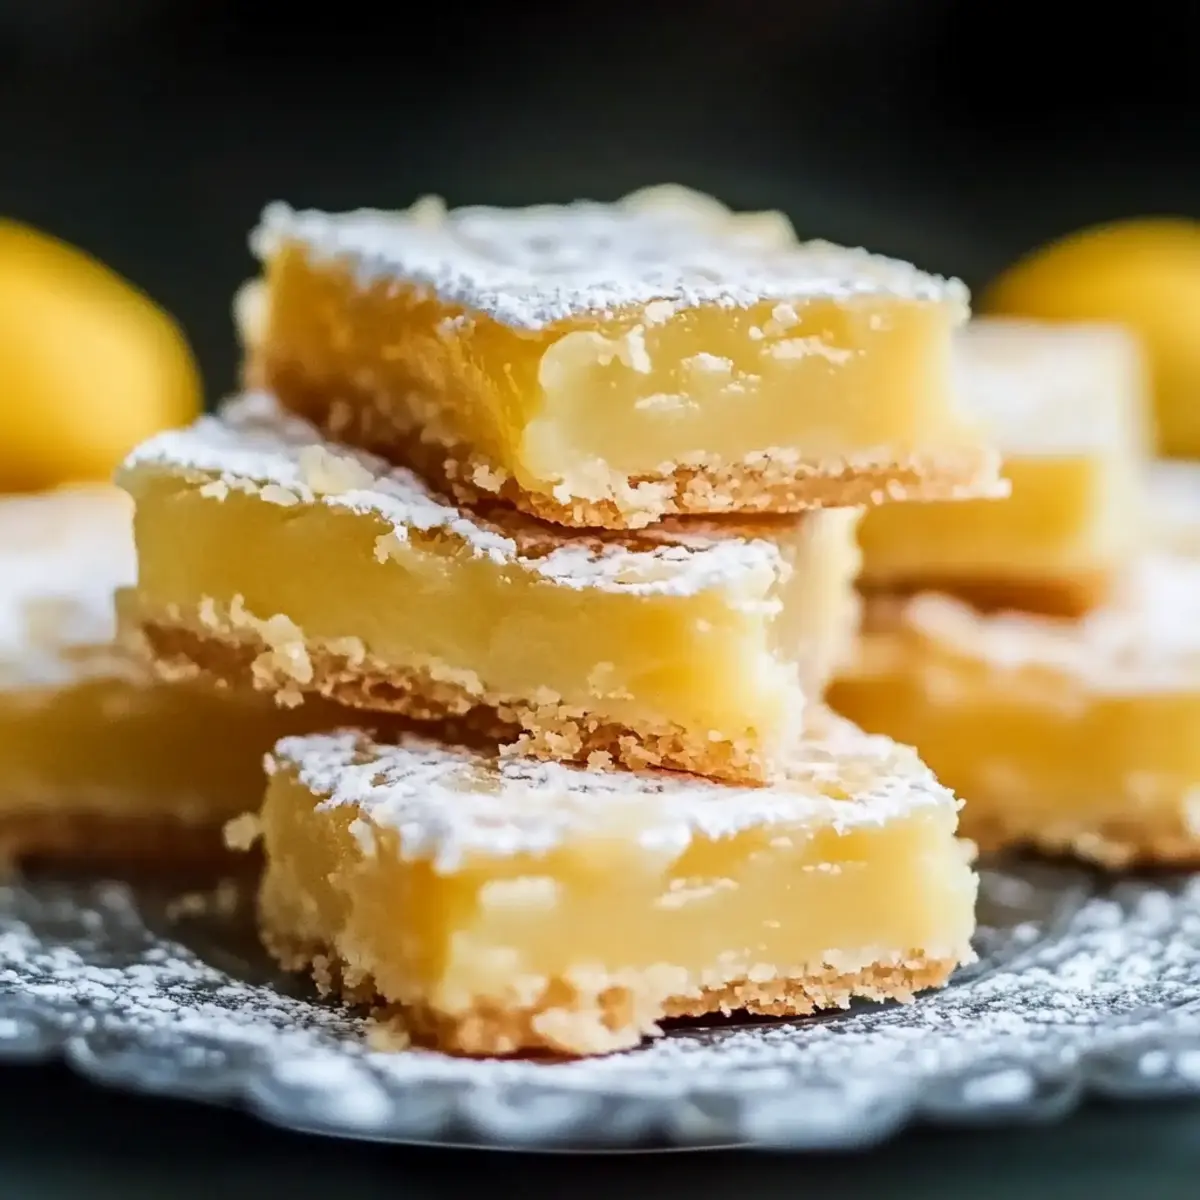
There's something truly uplifting about the first taste of a lemon bar – that sweet-tart explosion of flavor instantly brightens any day. I was reminded of this when a sunny afternoon prompted me to whip up a batch of Pioneer Woman Lemon Bars, and oh, did the kitchen come alive! With their buttery, crumbly crust cradling a silky lemon filling, these treats are the perfect antidote for anyone looking to escape the monotony of everyday desserts.
Whether you're hosting a gathering or just indulging in a well-deserved snack, these lemon bars offer an effortless yet impressive way to bring a little sunshine to your table. Straightforward to make and irresistibly delicious, they’ll quickly become a favorite in your dessert repertoire. Join me as we dive into this amazing ultimate recipe that’s not just about lemon but about creating warm memories in the kitchen!
Why are Pioneer Woman Lemon Bars so amazing?
Deliciously Refreshing: The bright, zesty flavor of fresh lemons elevates these bars to a whole new level of deliciousness.
Easy to Create: With simple ingredients and straightforward steps, even novice bakers can whip up this delightful dessert.
Perfect for Any Occasion: Whether it’s a sunny picnic or a cozy family dinner, these bars are a crowd-pleaser that fits every setting.
Buttery Crust: The contrast of the crumbly, buttery crust against the creamy filling creates a mouthwatering texture that’s simply irresistible.
Make Ahead Option: Ideal for busy schedules, prepare them in advance, refrigerate, and serve chilled for maximum enjoyment.
Nostalgic Comfort: Reminiscent of childhood summer days, these lemon bars are sure to evoke warm, happy memories.
Pioneer Woman Lemon Bars Ingredients
• Discover what makes these lemon bars a delight!
For the Crust
- Unsalted Butter – Provides richness and a flaky texture; use margarine for a dairy-free option.
- Granulated Sugar – Sweetens the crust to balance the tangy filling; consider brown sugar for a deeper flavor.
- All-Purpose Flour – Forms the base of the crust; for gluten-free version, substitute with a gluten-free flour blend.
- Salt – Elevates sweetness and enhances overall flavor.
For the Filling
- Eggs – Binds and adds structure to the filling; essential for achieving that creamy consistency.
- Lemon Juice – Freshly squeezed for bold tanginess; bottled juice lacks the vibrant flavor of fresh.
- Lemon Zest – Infuses aromatic citrus notes, enhancing the overall lemon flavor profile.
- Granulated Sugar – Sweetens the filling while balancing the acidity of lemons; don’t skimp on sweetness!
- All-Purpose Flour – Thickens the filling for the desired texture; ensures it sets beautifully when baked.
Optional Topping
- Powdered Sugar – Dust over the top before serving for an elegant touch and a hint of sweetness.
With these ingredients, you'll create Pioneer Woman Lemon Bars that are not just delicious but also a heartfelt addition to your dessert table!
How to Make Pioneer Woman Lemon Bars
-
Preheat the Oven: Begin by setting your oven to 350°F (175°C) and greasing a 9x13-inch baking pan to ensure easy removal later.
-
Make the Crust: In a mixing bowl, cream together your softened unsalted butter and granulated sugar until it’s light and fluffy. Gradually mix in the all-purpose flour and salt until the mixture resembles a crumbly dough.
-
Press the Crust: Evenly press this buttery mixture into the prepared baking pan to form a solid layer. Aim for a uniform thickness to ensure even baking.
-
Bake the Crust: Place the pan in the preheated oven and bake for 15-20 minutes. Look for a light golden color to ensure it’s just right; then, allow it to cool slightly.
-
Prepare the Filling: In a separate bowl, beat the eggs until frothy. Whisk in the granulated sugar, all-purpose flour, freshly squeezed lemon juice, and lemon zest until the mixture is smooth and well combined.
-
Combine Filling with Crust: Pour the luscious lemon filling over the cooled crust, spreading it evenly to cover every corner.
-
Bake Again: Return the pan to the oven and bake for another 20-25 minutes. The filling should be set but still slightly jiggle to the touch when done.
-
Cool Completely: Allow your lemon bars to cool at room temperature for 1-2 hours until fully set. Patience is key to perfect squares!
-
Cut and Serve: Once cooled, dust with powdered sugar if you’d like, and carefully cut into squares for serving.
Optional: Add a sprig of fresh mint for a pop of color and extra flavor!
Exact quantities are listed in the recipe card below.
Pioneer Woman Lemon Bars Variations
Feel free to let your creativity shine as you explore these delightful twists on the classic recipe!
-
Berry Bliss: Add blueberries or raspberries to the lemon filling for a fruity burst that pairs beautifully with the tanginess.
Imagine a fresh garden bursting with flavors, each bite dancing on your palate! -
Graham Cracker Crust: Swap the traditional crust for a graham cracker crust for a sweeter, crunchier experience that's a beloved classic.
This easy transition adds a nostalgic flavor reminiscent of summer gatherings; a real crowd-pleaser! -
Honey Sweetened: Replace granulated sugar with honey for a natural sweetness that enhances the lemon’s brightness.
The honey adds a floral note, turning each bite into a delightful experience that feels like a warm hug. -
Coconut Cream: Elevate your filling with some coconut cream to add a creamy richness and subtle tropical twist.
This variation transforms the bars into a beach vacation treat; it’s a taste of paradise! -
Peppered Citrus: Come alive with the zest of ginger or a hint of black pepper; this unusual addition can enhance the lemon's complexity.
These spices can elevate the flavor profile that dances between sweet and spicy; a delightful surprise for your guests! -
Lower Sugar: Try a sugar substitute for those watching their sugar intake; this way, everyone can indulge in the sweetness without guilt.
Your lemon bars will still maintain their delicious flavor while accommodating a healthier lifestyle. -
Nutty Crust: Incorporate almond flour or ground walnuts into the crust for added texture and a nutty flavor that complements the lemon filling perfectly.
Feel the crunch under your teeth, adding a new layer of enjoyment with every bite! -
Herbed Zest: Experiment with adding fresh basil or mint to the lemon filling for an unexpected flavor twist that elevates traditional ingredients.
The freshness from the herbs brings a whole new personality to your dessert, creating a refreshing experience that evokes endless summer days.
Expert Tips for Pioneer Woman Lemon Bars
-
Room Temperature Butter: Make sure your butter is soft enough for easy mixing, which helps achieve that perfect crumbly crust.
-
Watch the Bake Time: Avoid overbaking – the filling should jiggle slightly when you take it out of the oven for the best texture.
-
Fresh Lemons Only: Always use fresh lemon juice and zest for maximum flavor; bottled lemon juice can lead to a flat taste that doesn’t shine in your Pioneer Woman Lemon Bars.
-
Chill for Best Results: Allow the lemon bars to cool completely at room temperature before cutting; this helps with cutting clean squares.
-
Perfect Sizing: Use a sharp knife or pizza cutter to achieve even slices and a beautiful presentation.
Make Ahead Options
These Pioneer Woman Lemon Bars are perfect for meal prep and can effortlessly lighten your load for busy days! You can prepare the crust up to 24 hours in advance; just press it into the pan and refrigerate until you're ready to bake. The lemon filling can also be whisked together and stored in the fridge for up to 3 days. To maintain the quality, ensure the crust is cooled before adding the filling, and cover it well to prevent any absorption of odors. When you're ready to serve, simply bake as directed, let them cool completely, and your deliciously refreshing lemon bars will be just as delightful as if made fresh!
Storage Tips for Pioneer Woman Lemon Bars
Fridge: Store your lemon bars in an airtight container in the refrigerator for up to 5 days. This keeps them fresh while preserving their sweet and tangy flavor.
Freezer: For longer storage, wrap the lemon bars tightly in plastic wrap, then place them in a freezer-safe container. They can be frozen for up to 3 months.
Reheating: Thaw frozen bars in the refrigerator overnight before serving. Enjoy them cold, or let them come to room temperature for the best taste experience.
Serving Suggestion: Dust with powdered sugar just before serving for an elegant finish that enhances the sweetness of these delightful Pioneer Woman Lemon Bars.
What to Serve with Pioneer Woman Lemon Bars?
Experience the joy of dessert by pairing these delightful lemon bars with the perfect accompaniments!
-
Fresh Berries: Juicy strawberries or blueberries add a fresh burst of flavor, perfectly balancing the sweetness of the bars.
-
Whipped Cream: A dollop of whipped cream creates a creamy contrast to the tangy filling, making each bite even more indulgent.
-
Iced Tea: Refreshing and lightly sweetened iced tea serves as a lovely beverage pairing that complements the bright citrus notes.
Imagine sitting outside on a sunny day, enjoying the tangy delight of lemon bars while sipping chilled tea—pure bliss!
-
Vanilla Ice Cream: Creamy vanilla ice cream melts delightfully into the lemon bars, enriching the texture and flavor for a luscious treat.
-
Mint Leaves: A sprig of fresh mint elevates the presentation and adds a hint of aromatic freshness that pairs beautifully with lemon.
-
Chocolate Drizzle: A light drizzle of melted chocolate can enhance the dessert with a rich and decadent flair, creating a delicious contrast.
With these pairings, your table will be adorned with delicious flavors that make your Pioneer Woman Lemon Bars truly special!
Pioneer Woman Lemon Bars Recipe FAQs
What type of lemons should I use for the best flavor?
Absolutely, for the most vibrant and tangy flavor, use fresh lemons! Look for lemons that are bright yellow and firm, avoiding any with dark spots or a dull appearance. The juice and zest from fresh lemons will elevate the taste of your Pioneer Woman Lemon Bars to new heights.
How should I store leftover lemon bars?
To keep your Pioneer Woman Lemon Bars fresh, store them in an airtight container in the refrigerator. If properly stored, they can last for up to 5 days. This helps maintain their delightful sweet and tangy flavor while keeping the texture intact.
Can I freeze lemon bars for later use?
Yes! To freeze your Pioneer Woman Lemon Bars, wrap them tightly in plastic wrap and place them in a freezer-safe container. They can be stored in the freezer for up to 3 months. When you’re ready to enjoy them, just thaw them in the refrigerator overnight. This way, you can savor that refreshing taste whenever you like!
What should I do if the filling doesn’t set properly?
If your filling doesn't set after baking, it may need additional time in the oven. You should always take note that the filling should have a slight jiggle when you first take it out but will firm up as it cools. If you find it's still too liquid after an extended bake time, it might be best to check the accuracy of your oven's temperature. Using a kitchen thermometer can help ensure it’s heating correctly.
Can I make these lemon bars gluten-free?
Absolutely! To create a gluten-free version of Pioneer Woman Lemon Bars, simply substitute the all-purpose flour with a gluten-free flour blend in equal amounts. This will allow everyone to enjoy these delicious bars, regardless of dietary needs.
Is there a way to modify the sweetness of the filling?
Yes, you can adjust the sweetness of the filling to your liking! If you prefer a less sweet lemon bar, feel free to reduce the amount of granulated sugar in the filling by a couple of tablespoons. However, be mindful that this may alter the texture slightly, so mix it well to ensure it combines smoothly.
Irresistibly Easy Pioneer Woman Lemon Bars: A Sweet Delight
Ingredients
Equipment
Method
- Preheat the Oven: Begin by setting your oven to 350°F (175°C) and greasing a 9x13-inch baking pan to ensure easy removal later.
- Make the Crust: In a mixing bowl, cream together your softened unsalted butter and granulated sugar until it’s light and fluffy. Gradually mix in the all-purpose flour and salt until the mixture resembles a crumbly dough.
- Press the Crust: Evenly press this buttery mixture into the prepared baking pan to form a solid layer. Aim for a uniform thickness to ensure even baking.
- Bake the Crust: Place the pan in the preheated oven and bake for 15-20 minutes. Look for a light golden color to ensure it’s just right; then, allow it to cool slightly.
- Prepare the Filling: In a separate bowl, beat the eggs until frothy. Whisk in the granulated sugar, all-purpose flour, freshly squeezed lemon juice, and lemon zest until the mixture is smooth and well combined.
- Combine Filling with Crust: Pour the luscious lemon filling over the cooled crust, spreading it evenly to cover every corner.
- Bake Again: Return the pan to the oven and bake for another 20-25 minutes. The filling should be set but still slightly jiggle to the touch when done.
- Cool Completely: Allow your lemon bars to cool at room temperature for 1-2 hours until fully set. Patience is key to perfect squares!
- Cut and Serve: Once cooled, dust with powdered sugar if you’d like, and carefully cut into squares for serving.


Leave a Reply