
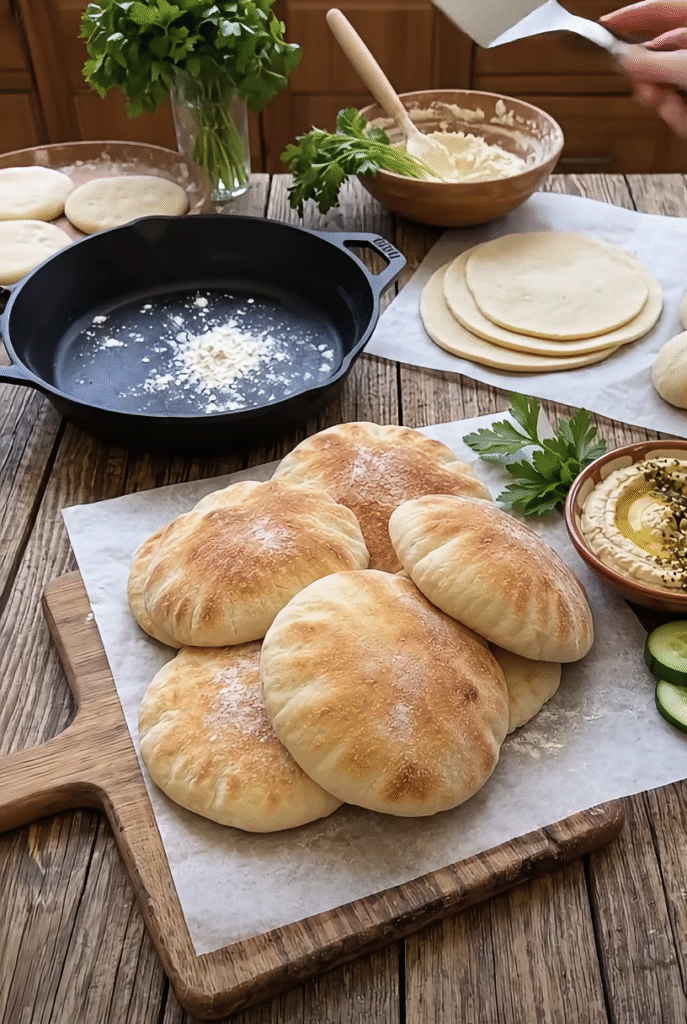
Soft & Fluffy Pocket Pita Bread is a delicious homemade flatbread with a lightly golden exterior, soft and chewy texture, and a beautiful hollow center that makes it perfect for stuffing. With just a handful of simple ingredients, you can make fresh pita bread that tastes wonderful with hummus, falafel, grilled chicken, gyros, or your favorite sandwich fillings.
The secret to getting that signature pita pocket is a combination of soft yeast dough, proper resting time, and a very hot cooking surface. As the dough cooks, steam builds inside the bread, causing it to puff into a round, airy pocket.
Best of all, you don't need a special bread oven or complicated baking equipment. A heavy skillet or cast-iron pan works beautifully for making homemade pita bread right on your stovetop.
This easy recipe makes eight delicious pita breads and takes approximately 1 hour and 40 minutes, including rising time.
I started making homemade pita bread after realizing how much better freshly cooked flatbread tastes compared with packaged versions. At first, I thought creating those perfectly puffed pockets would require special equipment or professional baking skills. However, once I tried a simple yeast dough and a hot cast-iron skillet, the process became surprisingly easy. Watching the first pita inflate like a little balloon was incredibly satisfying. Now, I love making a batch whenever we're having hummus, grilled chicken, or Mediterranean-inspired dinners. The bread tastes soft, warm, and comforting, and everyone enjoys filling their own pita pockets with their favorite ingredients.
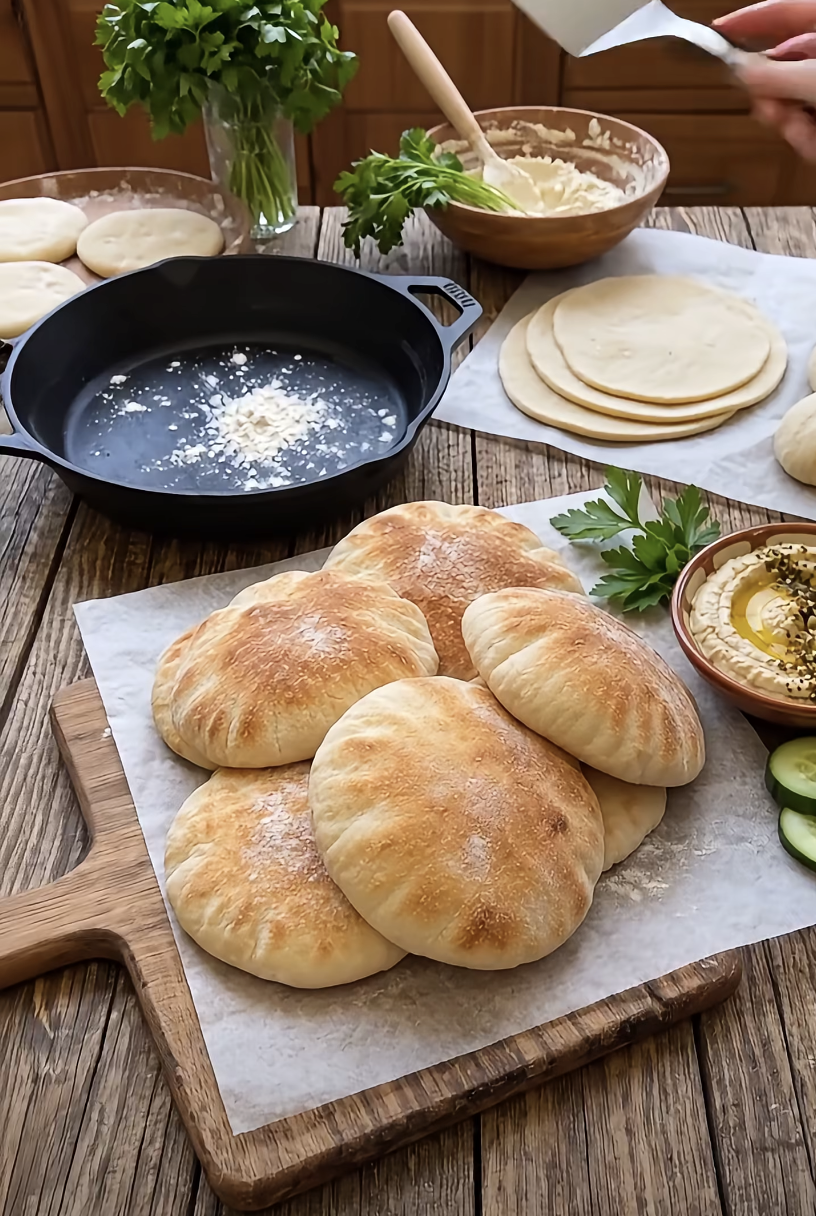
Soft & Fluffy Pocket Pita Bread
Ingredients
Equipment
Method
- Combine warm water, active dry yeast, and sugar or honey in a large bowl. Let stand 5–10 minutes until foamy.
- Add 3 cups flour, salt, and olive oil. Mix until a shaggy dough forms.
- Knead on a lightly floured surface for 7–8 minutes until smooth, elastic, and slightly tacky.
- Place dough in a lightly oiled bowl, cover, and let rise for approximately 1 hour or until doubled in size.
- Gently deflate dough and divide into 8 equal portions. Shape into balls, cover, and rest for 10 minutes.
- Roll each ball into an even circle approximately 6 inches wide and 1/4 inch thick. Keep unused dough covered.
- Preheat a heavy skillet or cast-iron pan over medium-high to high heat until very hot.
- Cook each pita in the dry skillet for 1–2 minutes until bubbles appear. Flip and cook another 1–2 minutes; flip again briefly if necessary until puffed and lightly golden. Adjust heat to prevent burning.
- Immediately transfer each cooked pita to a clean kitchen towel and cover to keep soft. Repeat with remaining dough and serve warm.
Nutrition
Notes
Tried this recipe?
Let us know how it was!Why You'll Love This Soft & Fluffy Pocket Pita Bread
Perfectly Soft, Chewy, and Beautifully Puffed
The biggest reason to make Soft & Fluffy Pocket Pita Bread at home is its incredible texture.
Fresh pita bread has a tender interior, a lightly chewy bite, and golden spots that develop as the dough cooks against the hot skillet.
Unlike some packaged pita breads, homemade pita tastes especially soft when you serve it warm.
The hollow pocket makes this bread particularly useful for sandwiches and wraps. Simply cut the pita in half and gently open the center to create space for your favorite fillings.
The dough contains olive oil, which contributes tenderness and a pleasant flavor.
Meanwhile, active dry yeast helps the bread develop its light texture during rising.
A short resting period after dividing the dough allows the gluten to relax, making each piece easier to roll.
When the dough meets a sufficiently hot skillet, steam expands inside the bread. As a result, the pita can puff into its familiar rounded shape.
Although individual pitas sometimes puff differently, the bread still tastes delicious even when a few pieces develop smaller pockets.
The combination of gentle chewiness, soft texture, and fresh bread flavor makes this recipe a wonderful addition to everyday meals.
Simple Ingredients and No Special Oven Required
Another reason this homemade pita recipe works so well is its straightforward ingredient list.
You only need all-purpose flour, warm water, active dry yeast, sugar or honey, salt, and olive oil.
These basic ingredients create a soft yeast dough without requiring milk, eggs, butter, or specialty flour.
Additionally, you can prepare the dough by hand.
A stand mixer makes kneading easier, but it isn't necessary.
The cooking method is equally convenient.
Instead of heating a traditional bread oven, you can cook each pita in a heavy skillet on your stovetop.
A cast-iron skillet works particularly well because it retains heat and distributes it evenly.
The recipe also makes eight pita breads, giving you enough for several sandwiches or a family dinner.
You can enjoy them immediately or store leftovers for another meal.
For extra convenience, you can freeze cooked pita bread and reheat it whenever you need fresh-tasting flatbread.
Whether you're new to bread making or already enjoy working with yeast dough, this recipe offers a practical introduction to homemade flatbreads.
Choosing the Best Ingredients for Homemade Pocket Pita Bread
Flour, Yeast, and Water: The Foundation of Great Pita
Every ingredient in Soft & Fluffy Pocket Pita Bread contributes to its texture and flavor.
All-purpose flour creates a balanced dough that's soft enough to puff while maintaining enough structure to hold its shape.
For this recipe, you'll need three cups of flour, approximately 375 grams when measured by spooning flour into the cup and leveling it.
Avoid packing the flour into your measuring cup because too much flour can produce a stiff, dry dough.
If you have a kitchen scale, weighing the flour offers more consistent results.
Active dry yeast helps the dough rise and develop a light, airy texture.
One standard packet contains approximately 2 1/4 teaspoons of yeast, which works perfectly for this recipe.
Warm water activates the yeast and hydrates the flour.
Aim for water between 105°F and 110°F.
Water that's too hot can damage the yeast, while cold water slows the rising process.
Sugar or honey provides a small amount of sweetness and helps support yeast activity.
Salt enhances flavor and contributes to dough structure.
Finally, olive oil adds tenderness and gives the finished bread a subtle richness.
Because the dough uses so few ingredients, measuring carefully makes a noticeable difference.
How to Make Dough That's Soft and Easy to Roll
The best pita dough should feel soft, smooth, and slightly tacky without sticking excessively to your hands.
Start by combining warm water, yeast, and sugar or honey in a large bowl.
Allow the mixture to rest for five to ten minutes.
During this time, active yeast should create a foamy layer on the surface.
If the mixture doesn't foam, check the yeast's expiration date and water temperature before continuing.
Next, add the flour, salt, and olive oil.
Mix until the ingredients form a shaggy dough.
Transfer the mixture to a lightly floured work surface and knead for approximately seven to eight minutes.
Push the dough forward with the heel of your hand, fold it back, and repeat.
As you knead, the dough becomes smoother and more elastic.
If it sticks heavily, add small amounts of flour rather than adding a large quantity at once.
Too much extra flour can make the finished pita bread dense.
Once the dough becomes smooth, place it in a lightly oiled bowl and cover it.
Let it rise in a warm, draft-free place for approximately one hour or until it doubles in size.
A properly risen dough rolls easily and produces a more tender finished bread.
How to Make Soft & Fluffy Pocket Pita Bread Perfectly
Shaping the Dough for Beautiful Pita Pockets
After the dough doubles in size, gently press it down to release excess gas.
Transfer it to a lightly floured work surface.
Next, divide the dough into eight equal portions.
For consistent results, use a kitchen scale and weigh each portion.
Shape each piece into a smooth ball by gently pulling the edges underneath.
Arrange the dough balls on your work surface and cover them with a clean kitchen towel.
Let them rest for approximately ten minutes.
This resting period relaxes the gluten and makes the dough easier to roll without springing back.
After resting, flatten one dough ball with your palm.
Using a rolling pin, roll it into a circle approximately six inches wide and 1/4 inch thick.
Try to maintain an even thickness across the entire circle.
Uneven dough can create weak spots where steam escapes, preventing a full pocket from forming.
Avoid tearing the dough or pressing it excessively thin.
If the dough resists rolling, let it rest for another few minutes before continuing.
Keep the remaining dough balls covered while you work.
For the best results, roll only a few pitas ahead of cooking so the surfaces don't dry out.
Smooth, evenly rolled dough gives each pita the best chance of puffing successfully.
Cooking Pita Bread in a Hot Skillet
Heat a heavy skillet or cast-iron pan over medium-high to high heat.
Allow it to preheat thoroughly before adding the first pita.
The cooking surface should be hot enough to create bubbles quickly, but it shouldn't burn the flour coating the dough.
Carefully place one rolled pita into the dry skillet.
Cook for approximately one to two minutes.
Small bubbles should begin appearing across the surface.
Once the underside develops light golden spots, flip the pita using tongs or a spatula.
Cook the second side for another one to two minutes.
During this stage, the pita may begin inflating into a round pocket.
If necessary, flip it once more and cook briefly until it puffs and develops additional golden spots.
Avoid pressing down on the bread while it inflates because this can force steam out and collapse the pocket.
If the pita browns too quickly, reduce the heat slightly.
If it stays pale and doesn't bubble, increase the heat carefully.
Once cooked, transfer the pita to a clean kitchen towel.
Cover it immediately to trap a little residual steam and keep the bread soft.
Repeat the process with the remaining dough.
Keep the finished breads stacked inside the towel until you're ready to serve.
Serving Ideas, Storage Tips, and Common Pita Bread Problems
Delicious Ways to Serve Homemade Pocket Pita Bread
Soft & Fluffy Pocket Pita Bread works beautifully with countless savory fillings and dipping sauces.
One of the easiest ways to enjoy it is with hummus.
Serve warm pita wedges alongside classic chickpea hummus, roasted red pepper hummus, or creamy garlic dip.
For a satisfying lunch, fill the pita pockets with grilled chicken, chopped tomatoes, cucumbers, lettuce, and a spoonful of tzatziki.
You can also prepare delicious falafel sandwiches.
Simply fill each pita with crispy falafel, shredded cabbage, tomatoes, and tahini sauce.
For a Mediterranean-inspired dinner, pair the bread with grilled lamb, chicken skewers, or seasoned beef.
Fresh vegetables add crunch and balance the warm bread beautifully.
Pita bread also makes an excellent base for quick homemade pizzas.
Spread a little tomato sauce over a pita, add mozzarella and your favorite toppings, and bake until the cheese melts.
For breakfast, try filling a warm pita with scrambled eggs, avocado, and fresh herbs.
You can even cut leftover pita into triangles, brush them lightly with olive oil, and bake them into crispy pita chips.
Their versatility makes homemade pita bread useful for lunches, dinners, snacks, and appetizers.
How to Store, Reheat, and Troubleshoot Pita Bread
Fresh pita tastes best shortly after cooking, but proper storage helps preserve its softness.
Allow the breads to cool completely before placing them in an airtight bag or container.
You can store homemade pita at room temperature for approximately one to two days.
For longer storage, freeze the cooled pita breads for up to three months.
Place parchment paper between individual pieces to prevent them from sticking together.
When you're ready to serve, thaw them briefly and warm them in a covered skillet over low heat.
You can also wrap several pitas in foil and heat them in a 300°F oven until warm.
Avoid overheating because excessive heat can dry out the bread.
If your pita doesn't puff, several factors may contribute.
First, check that your skillet reaches a sufficiently high temperature.
A cool skillet allows the dough to cook slowly without creating enough rapid steam.
Next, examine the thickness of the dough.
Uneven rolling or thin spots can allow steam to escape.
Also, make sure the dough receives enough rising and resting time.
Underproofed dough may feel tight and resist proper expansion.
Finally, avoid using excessive flour while rolling because it can dry the surface.
Even if a pita doesn't form a complete pocket, you can still enjoy it as a soft flatbread for wraps or dipping.
Ingredients
Yield: 8 pita breads | Prep time: 20 minutes | Rise time: 1 hour | Cooking time: approximately 20 minutes | Total: about 1 hour 40 minutes
- 3 cups (375 g) all-purpose flour
- 1 cup (240 ml) warm water, approximately 105–110°F
- 2 1/4 teaspoons (7 g) active dry yeast
- 1 teaspoon granulated sugar or honey
- 1 teaspoon fine salt
- 2 tablespoons olive oil
- 2 tablespoons all-purpose flour, approximately, for dusting
Instructions
1. Activate the yeast. In a large mixing bowl, combine the warm water, active dry yeast, and sugar or honey. Stir gently and let stand for 5 to 10 minutes until foamy.
2. Mix the dough. Add the flour, salt, and olive oil. Stir until the ingredients form a shaggy dough.
3. Knead until smooth. Transfer the dough to a lightly floured surface. Knead for 7 to 8 minutes until smooth, elastic, and slightly tacky.
4. Let the dough rise. Place the dough in a lightly oiled bowl. Cover and let rise in a warm place for approximately 1 hour, or until doubled in size.
5. Divide and rest. Gently deflate the dough and divide it into 8 equal pieces. Shape each piece into a ball, cover with a kitchen towel, and let rest for 10 minutes.
6. Roll the pitas. On a lightly floured surface, roll each dough ball into a circle approximately 6 inches wide and 1/4 inch thick. Keep the thickness even.
7. Preheat the skillet. Heat a heavy skillet or cast-iron pan over medium-high to high heat until very hot.
8. Cook the pita bread. Place one pita in the dry skillet and cook for 1 to 2 minutes until bubbles appear. Flip and cook for another 1 to 2 minutes. Flip once more if necessary until the pita puffs and develops light golden spots. Adjust heat to prevent burning.
9. Keep warm and soft. Transfer each cooked pita to a clean kitchen towel and cover immediately. Repeat with the remaining dough. Serve warm with your favorite fillings or dips.
Frequently Asked Questions
1. Why doesn't my homemade pita bread puff up?
Pita bread usually fails to puff when the skillet isn't hot enough, the dough has uneven thickness, or small tears allow steam to escape. For the best results, preheat the skillet thoroughly, roll each pita evenly to approximately 1/4 inch thick, and avoid overhandling the dough.
2. Can I make pita bread without a cast-iron skillet?
Yes. A heavy stainless-steel skillet or another suitable thick-bottomed pan works well. You can also bake pita bread on a preheated baking stone or baking steel in a very hot oven. The important factor is strong, consistent heat that creates steam quickly.
3. Can I prepare pita dough ahead of time?
Absolutely. After kneading, place the dough in a lightly oiled covered container and refrigerate it overnight. The dough will rise more slowly in the refrigerator. The next day, allow it to warm slightly, divide it into portions, rest, roll, and cook as directed.
4. How do I keep homemade pita bread soft?
Place freshly cooked pita bread inside a clean kitchen towel immediately after removing it from the skillet. The towel helps retain moisture and prevents the bread from drying out. Once cooled, store the pita in an airtight container or freezer-safe bag.
5. Can I freeze homemade pocket pita bread?
Yes. Homemade pita bread freezes very well. Cool the breads completely, separate them with parchment paper, and place them in a freezer-safe bag. Freeze for up to three months for the best quality. Reheat gently in a skillet or oven before serving.
Conclusion
Soft & Fluffy Pocket Pita Bread proves that homemade bread doesn't need to involve complicated equipment or difficult techniques.
With simple pantry ingredients, a little kneading, and a hot skillet, you can create tender, chewy pita breads with beautifully puffed pockets and lightly golden surfaces.
The secret lies in allowing the dough to rise properly, rolling it to an even thickness, and cooking it over sufficiently high heat.
Once you master these basic steps, homemade pita bread becomes an easy addition to your regular meal rotation.
Whether you fill the pockets with grilled chicken, falafel, fresh vegetables, or your favorite sandwich ingredients, freshly made pita brings delicious flavor and texture to every meal.
Make a batch for dinner, freeze a few for later, and enjoy the satisfaction of serving warm, homemade pita bread straight from your kitchen.
Leave a Reply