
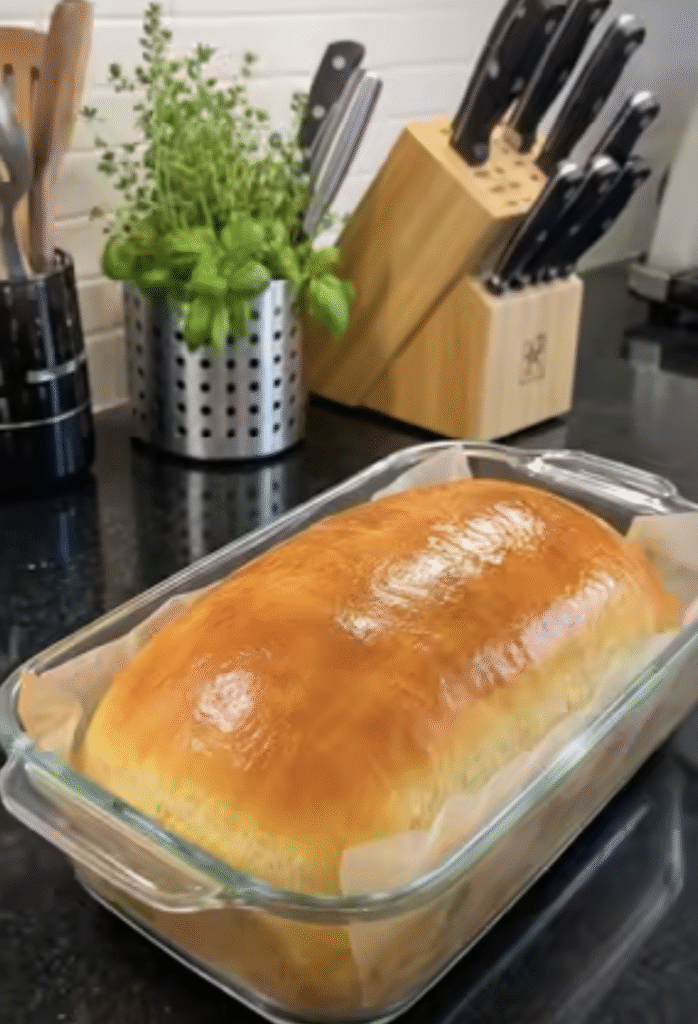
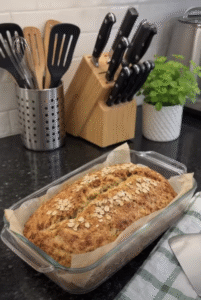
No-Knead Soft & Fluffy Sandwich Bread is the perfect homemade bread for anyone who loves a tender, pillowy loaf with a beautiful golden crust. This easy recipe combines simple pantry ingredients, warm milk, honey, butter, and yeast to create delicious sandwich bread without any kneading.
Unlike traditional bread recipes that require several minutes of kneading, this no-knead method lets you mix everything together with a wooden spoon. Then, the yeast and resting time do most of the work.
The result is a wonderfully soft loaf with a delicate crumb, subtle sweetness, and buttery flavor. It's perfect for sandwiches, breakfast toast, French toast, grilled cheese, or simply enjoying warm with butter.
Best of all, this recipe requires minimal hands-on preparation, making it ideal for beginners and busy home bakers.
I started making no-knead sandwich bread when I wanted fresh homemade bread without spending extra time kneading dough. I loved the idea of mixing everything in one bowl and letting the dough rise while I worked on other things. The first loaf came out of the oven with a beautiful golden top, and the kitchen smelled absolutely wonderful. After it cooled, I sliced it for sandwiches and immediately noticed how soft the center felt. Since then, this bread has become one of my favorite weekend recipes. It's simple enough for beginners but delicious enough to make regularly.
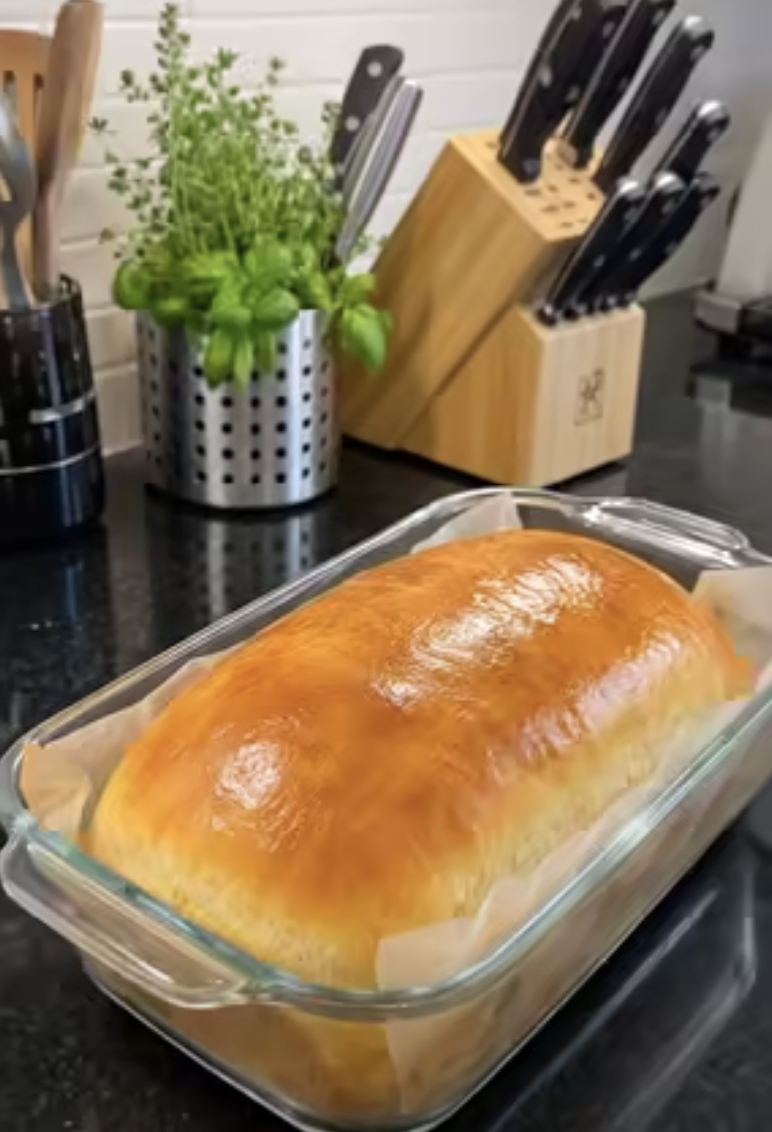
No-Knead Soft & Fluffy Sandwich Bread
Ingredients
Equipment
Method
- Stir flour, instant yeast, and salt together in a large mixing bowl.
- In a separate bowl, whisk warm milk, warm water, honey, 2 tablespoons melted butter, and the egg until combined.
- Pour wet ingredients into dry ingredients. Stir with a wooden spoon or sturdy spatula until no dry flour remains and the dough looks sticky and shaggy. Do not knead.
- Cover bowl and let dough rise in a warm, draft-free place for about 1 hour, until doubled.
- Lightly grease or line a standard 9-by-5-inch loaf pan with parchment paper.
- Gently stir down risen dough, transfer to prepared loaf pan, and smooth the surface with a lightly greased spatula.
- Cover loosely and rise for 30–40 minutes, until puffy and near the top of the pan. Preheat oven to 350°F.
- Bake on the center oven rack for 30–35 minutes, until golden brown and the internal temperature is approximately 190–200°F. Loosely tent with foil if browning too quickly.
- Remove loaf from oven and brush the top with 1 tablespoon melted butter.
- Cool in pan for 10 minutes, transfer to a wire rack, and cool completely before slicing.
Nutrition
Notes
Tried this recipe?
Let us know how it was!Why You'll Love This No-Knead Soft & Fluffy Sandwich Bread
Perfectly Soft Texture With a Beautiful Golden Crust
The biggest reason to make No-Knead Soft & Fluffy Sandwich Bread at home is its wonderful texture.
The bread has a light, tender center that makes every slice delicious. Meanwhile, the golden crust provides just enough structure to hold sandwiches together without becoming overly tough.
Warm milk contributes moisture and tenderness, while melted butter gives the loaf a rich, comforting flavor.
Honey adds a delicate sweetness that complements both savory and sweet toppings.
The egg contributes additional richness and helps create a soft, cohesive crumb.
Unlike crusty artisan bread, this recipe focuses on a tender texture that works well for everyday sandwiches.
The dough contains more moisture than many traditional sandwich bread recipes. Consequently, it feels sticky rather than firm.
That extra moisture helps create a soft loaf, although you need to handle the dough gently during shaping.
Because you don't knead the dough, proper mixing and rising time become especially important.
The resting periods allow the flour to absorb moisture and the yeast to produce gas that helps the bread rise.
As a result, you can create a satisfying homemade loaf with very little physical effort.
An Easy Bread Recipe for Beginners
Another advantage of this no-knead sandwich bread is its simple preparation method.
You don't need a stand mixer, bread machine, or complicated bread-making equipment.
Instead, a large bowl, wooden spoon, and loaf pan handle almost everything.
The recipe also uses familiar grocery ingredients, including flour, milk, yeast, salt, honey, butter, and an egg.
Most home kitchens already contain several of these staples.
The first rising period takes approximately one hour. During this time, the dough expands and develops its structure.
Afterward, you gently stir it down, transfer it to a loaf pan, and allow a second rise.
Finally, the bread bakes until golden brown.
The process requires patience, but it doesn't demand advanced baking skills.
Additionally, you can use the finished loaf for many different meals.
Slice it for sandwiches, toast it for breakfast, or turn leftover pieces into French toast.
Its versatility makes this recipe a practical choice for anyone who wants to begin baking homemade bread regularly.
Choosing the Best Ingredients for No-Knead Sandwich Bread
Flour, Yeast, and Liquid: The Foundation of Soft Bread
Every ingredient in No-Knead Soft & Fluffy Sandwich Bread plays an important role.
All-purpose flour forms the structure of the loaf. You'll need three cups, approximately 375 grams when you measure by spooning flour into the cup and leveling it.
For the most reliable results, use a kitchen scale if you have one.
Too much flour can make the bread dense, while too little flour can cause the loaf to collapse or develop a gummy center.
Instant yeast helps the dough rise without requiring a separate activation step.
You'll need 2 1/4 teaspoons, which equals one standard packet.
Because instant yeast works directly with dry ingredients, you can mix it into the flour before adding the liquids.
Warm milk makes the crumb soft and tender.
Meanwhile, warm water adds hydration without making the bread excessively rich.
Aim for liquids that feel pleasantly warm, approximately 100°F to 110°F, rather than hot.
Very hot liquid can damage the yeast and prevent the dough from rising properly.
Salt enhances flavor and supports dough structure.
Finally, honey feeds the yeast slightly and gives the bread a subtle sweetness.
These simple ingredients work together to create a soft, flavorful loaf.
Why Butter, Honey, and Eggs Make a Difference
The combination of butter, honey, and egg helps distinguish this recipe from basic lean bread dough.
Melted butter contributes flavor and tenderness.
Because fat coats some flour proteins, it helps create a softer texture than bread made only with flour, water, yeast, and salt.
Honey adds mild sweetness and encourages an attractive golden color during baking.
However, the recipe uses only two tablespoons, so the finished bread doesn't taste like dessert.
The egg contributes richness, moisture, and structure.
It also helps produce a pleasantly soft crumb that holds together when sliced.
For the best results, use a large egg at room temperature.
If your egg is cold, place it in a bowl of lukewarm water for a few minutes before using it.
Allow melted butter to cool slightly before combining it with the egg.
Extremely hot butter can start cooking the egg or make the liquid mixture too warm for the yeast.
You can use whole milk for a richer flavor, although 2% milk also works well.
For the softest crust, brush the finished loaf with one tablespoon of melted butter immediately after baking.
This finishing step adds shine and helps the crust stay tender as the bread cools.
How to Make No-Knead Soft & Fluffy Sandwich Bread Perfectly
Mixing the Dough and Getting the First Rise Right
The first step in making No-Knead Soft & Fluffy Sandwich Bread is combining the dry ingredients.
Add the all-purpose flour, instant yeast, and salt to a large mixing bowl.
Stir thoroughly so the yeast distributes evenly throughout the flour.
In a separate bowl, whisk together the warm milk, warm water, honey, melted butter, and egg.
Next, pour the wet mixture into the dry ingredients.
Use a wooden spoon or sturdy spatula to stir until the flour disappears and the dough becomes sticky and shaggy.
Unlike conventional bread dough, this mixture shouldn't form a firm, smooth ball.
Instead, expect a thick, sticky consistency.
Because this recipe uses a generous amount of liquid, the dough may resemble a very thick batter. That's normal.
However, it should still have enough body to hold some shape when you stir it.
Cover the bowl with plastic wrap or a clean kitchen towel.
Place it in a warm, draft-free location for approximately one hour.
During this time, the yeast produces gas that causes the dough to expand.
Let the dough rise until it roughly doubles in volume.
If your kitchen feels cool, the first rise may take longer.
Rather than relying entirely on the clock, watch the dough's appearance.
A properly risen dough should look noticeably larger, airy, and bubbly.
Shaping, Proofing, and Baking the Perfect Loaf
After the first rise, gently stir the dough to release some trapped gas.
Avoid aggressively beating it because you want to preserve its developing structure.
Next, grease a standard 9-by-5-inch loaf pan or line it with parchment paper.
Transfer the sticky dough into the prepared pan.
Use a lightly greased spatula to spread it evenly and smooth the surface.
Because this is a no-knead dough, you don't need to roll or shape it like conventional sandwich bread.
Cover the loaf pan loosely and allow the dough to rise again.
The second rise usually takes 30 to 40 minutes.
However, the dough's temperature and yeast activity can affect the timing.
Let the dough become puffy and rise toward the top of the pan.
Avoid allowing it to rise excessively above the rim because overproofed dough can collapse in the oven.
Meanwhile, preheat your oven to 350°F.
Once the dough finishes rising, place the loaf pan on the center oven rack.
Bake for approximately 30 to 35 minutes.
The top should develop a golden-brown color, and the loaf should feel firm enough to hold its shape.
For additional confidence, check the center with an instant-read thermometer. Aim for approximately 190°F to 200°F.
If the top browns too quickly, loosely tent the loaf with foil.
After baking, brush the warm crust with melted butter.
Let the bread rest in the pan for ten minutes, then transfer it to a wire rack.
Allow it to cool completely before slicing for the neatest results.
Serving Ideas, Storage Tips, and Common Bread Problems
Delicious Ways to Enjoy Homemade Sandwich Bread
No-Knead Soft & Fluffy Sandwich Bread works beautifully for breakfast, lunch, dinner, and snacks.
One of the easiest ways to enjoy it is with a little softened butter.
The tender crumb absorbs the butter beautifully, creating a simple and comforting treat.
For breakfast, toast a slice and spread it with strawberry jam, peanut butter, or honey.
You can also prepare avocado toast with sliced tomatoes and a sprinkle of black pepper.
For lunch, this bread makes an excellent base for turkey sandwiches, chicken salad, egg salad, or grilled cheese.
Its soft texture complements creamy fillings particularly well.
Because the bread has a slightly sweet flavor, it also works wonderfully for peanut butter and jelly sandwiches.
Another delicious option is homemade French toast.
Dip thick slices into a mixture of eggs, milk, cinnamon, and vanilla, then cook them in a buttered skillet.
The bread absorbs the custard while maintaining a tender center.
For a savory breakfast, serve toasted slices with scrambled eggs and cheese.
You can even use leftover bread for homemade croutons or bread pudding.
If you're serving soup, offer thick slices alongside tomato soup, vegetable soup, or creamy chicken soup.
The versatility of this loaf makes it useful throughout the week.
How to Store Bread and Avoid Common Baking Mistakes
Proper storage helps keep No-Knead Soft & Fluffy Sandwich Bread fresh and tender.
Once the loaf cools completely, store it in an airtight bag or bread container.
At room temperature, the bread generally maintains good quality for approximately three days.
Keep it away from direct sunlight and excessive heat.
Although you can refrigerate bread, refrigeration often accelerates staling. Therefore, freezing usually works better for longer storage.
To freeze, slice the cooled loaf and place parchment paper between slices if needed.
Transfer the bread to a freezer-safe bag and remove as much air as possible.
For the best quality, use frozen slices within two to three months.
When you're ready to eat, toast individual slices directly from frozen or thaw them at room temperature.
If your loaf turns out dense, check your yeast freshness and rising conditions.
Old yeast or liquids that are too hot can prevent proper fermentation.
If the center feels gummy, the bread may need additional baking time or more cooling before slicing.
A very wet dough can also contribute to a heavy crumb, especially if you add too little flour.
If the loaf collapses, excessive proofing may be the cause.
For the most consistent results, measure the ingredients carefully, avoid overproofing, and let the bread cool before cutting.
With a little practice, you'll learn how the dough should look and feel at each stage.
Ingredients
Yield: 1 loaf, approximately 10–12 slices | Prep: 10 minutes | Rise: 1 hour 30–40 minutes | Bake: 30–35 minutes | Total: approximately 2 hours 10–25 minutes, plus cooling
For the bread
- 3 cups (375 g) all-purpose flour
- 2 1/4 teaspoons (7 g) instant yeast
- 1 teaspoon fine salt
- 1 cup (240 ml) warm milk, approximately 100–110°F
- 1/2 cup (120 ml) warm water, approximately 100–110°F
- 2 tablespoons honey
- 2 tablespoons unsalted butter, melted and slightly cooled
- 1 large egg, preferably at room temperature
For the top
- 1 tablespoon unsalted butter, melted, for brushing
Instructions
1. Combine the dry ingredients. In a large mixing bowl, stir together the all-purpose flour, instant yeast, and salt until evenly combined.
2. Mix the wet ingredients. In a separate bowl, whisk the warm milk, warm water, honey, melted butter, and egg until smooth.
3. Make the dough. Pour the wet ingredients into the flour mixture. Stir with a wooden spoon or sturdy spatula until no dry flour remains and a sticky, shaggy dough forms. Do not knead.
4. Let the dough rise. Cover the bowl and place it in a warm, draft-free location for approximately 1 hour, or until the dough doubles in size.
5. Prepare the loaf pan. Lightly grease a standard 9-by-5-inch loaf pan or line it with parchment paper.
6. Transfer and smooth. Gently stir down the risen dough. Transfer it to the prepared pan and smooth the surface with a lightly greased spatula.
7. Allow the second rise. Cover loosely and let the dough rise for 30 to 40 minutes, until it looks puffy and approaches the top of the loaf pan. Meanwhile, preheat the oven to 350°F.
8. Bake the bread. Place the pan on the center oven rack. Bake for 30 to 35 minutes, until golden brown and the center reaches approximately 190–200°F. Tent loosely with foil if the top browns too quickly.
9. Brush with butter. Remove the bread from the oven and brush the warm top with 1 tablespoon melted butter.
10. Cool and slice. Let the loaf cool in the pan for 10 minutes. Transfer it to a wire rack and allow it to cool completely before slicing.
Frequently Asked Questions
1. Can I really make sandwich bread without kneading?
Yes. This recipe uses a high-moisture dough and resting time to develop structure without traditional kneading. You simply mix the ingredients thoroughly, allow the dough to rise, and transfer it to a loaf pan. The result is a tender, soft sandwich loaf.
2. Why is my no-knead sandwich bread dough so sticky?
The recipe contains a relatively high amount of liquid, which creates a soft, sticky dough. This moisture contributes to the bread's tender texture. Avoid adding large amounts of extra flour because doing so can make the finished loaf dense and dry.
3. Can I make this bread with active dry yeast instead of instant yeast?
Yes. Use the same amount of active dry yeast, but dissolve it in the warm water with a little honey first. Let it stand for approximately 5 to 10 minutes until foamy before combining it with the remaining wet and dry ingredients. Rising may take slightly longer.
4. How do I keep homemade sandwich bread soft for several days?
Allow the bread to cool completely, then store it in an airtight bag or container at room temperature for up to three days. For longer storage, slice and freeze the loaf. Avoid refrigerating it unless necessary because refrigeration can cause bread to stale faster.
5. Why did my homemade sandwich bread collapse after rising?
Overproofing is a common cause of collapsed bread. If the dough rises too high before baking, its structure may become too weak to support the loaf. Excessive liquid, inaccurate flour measurements, or insufficient baking can also contribute. Use a properly sized loaf pan and bake when the dough becomes puffy near the rim.
Conclusion
No-Knead Soft & Fluffy Sandwich Bread makes homemade bread baking simple, convenient, and rewarding.
With basic pantry ingredients and no kneading, you can create a beautifully golden loaf with a soft, tender center and delicious buttery flavor.
The combination of warm milk, honey, butter, and egg produces a rich texture that works perfectly for sandwiches, toast, and everyday meals.
Because the recipe requires only a few minutes of hands-on preparation, even beginner bakers can enjoy making fresh bread at home.
Remember to measure carefully, allow the dough to rise properly, and bake the loaf until the center cooks through.
Once you've made your first loaf, you may find yourself returning to this easy homemade bread recipe again and again.
Whether you enjoy it toasted for breakfast, filled with your favorite sandwich ingredients, or simply spread with butter, this soft and fluffy sandwich bread brings homemade comfort to every slice.
Leave a Reply