
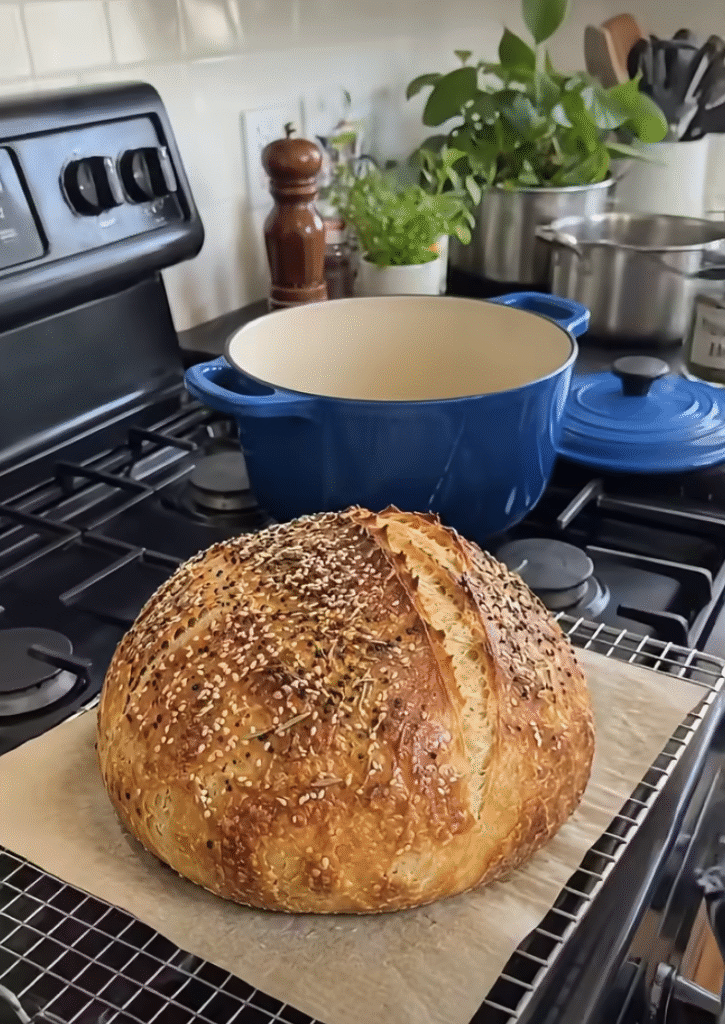
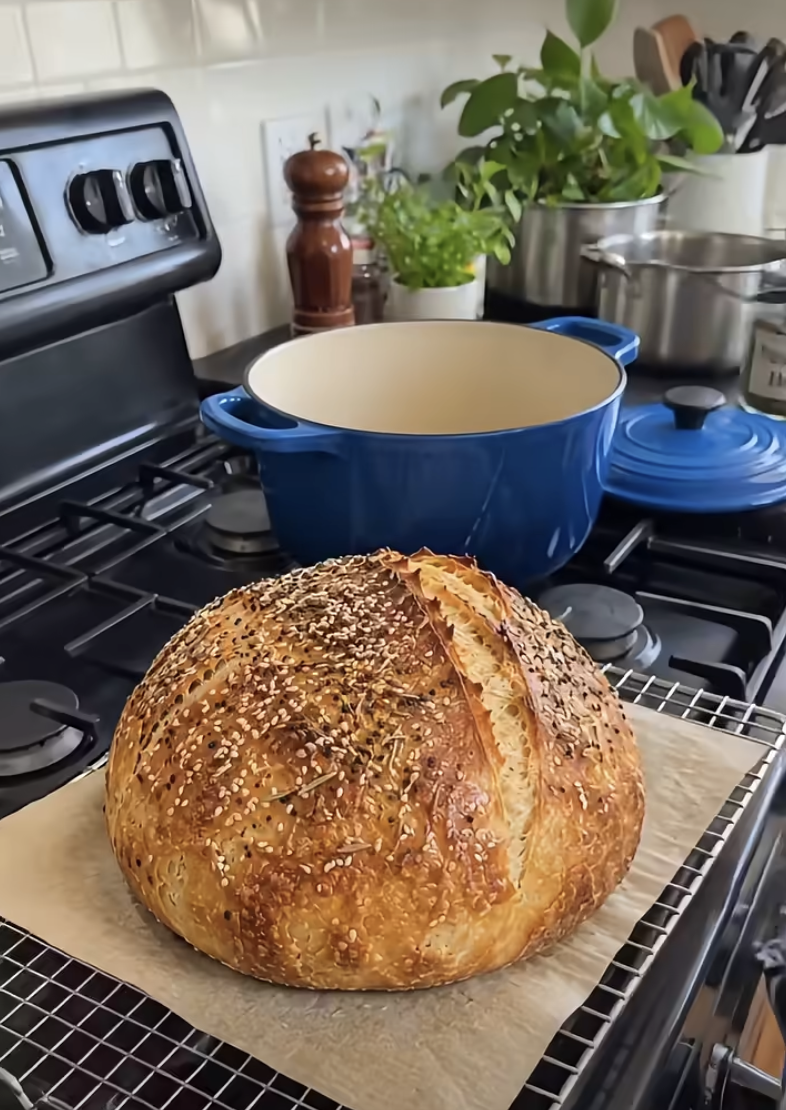
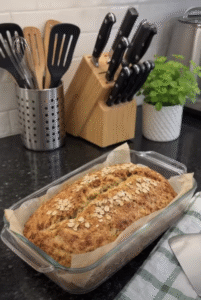
Easy No-Knead Farmhouse Bread brings the comforting aroma of freshly baked bread into your kitchen with just a handful of simple ingredients. This rustic homemade loaf features a beautifully crisp golden crust, a soft and chewy center, and the delicious flavor you expect from traditional farmhouse bread.
Best of all, you don't need a stand mixer, bread machine, or advanced baking skills. Simply mix the ingredients, allow the dough to rise, and bake it in a hot Dutch oven.
The combination of a moist dough, gentle rising, and high baking temperature creates a rustic loaf with a wonderfully textured crust. Meanwhile, the covered Dutch oven traps steam during the first stage of baking, helping the bread expand and develop its signature exterior.
Whether you're making sandwiches, serving warm bread alongside soup, or enjoying a thick slice with butter and honey, this easy recipe makes homemade bread baking feel approachable.
I started making easy no-knead farmhouse bread when I wanted fresh homemade bread without spending a long afternoon kneading dough. I loved traditional rustic loaves, but the preparation always seemed more complicated than I wanted. Then I tried mixing flour, yeast, salt, and water in one bowl and letting time do most of the work. The first loaf came out of the Dutch oven with a deeply golden crust and a wonderful homemade aroma. After it cooled, I sliced into the tender center and immediately understood why this simple method had become so popular. Now, I love making a loaf for weekend breakfasts and cozy family dinners.
Easy No-Knead Farmhouse Bread
Ingredients
Equipment
Method
- Stir flour, salt, and instant yeast together in a large bowl.
- Add warm water and optional honey or sugar and olive oil. Stir with a wooden spoon until a sticky, shaggy dough forms. Do not knead.
- Cover and let dough rise in a warm, draft-free place for 2–3 hours, until roughly doubled and bubbly.
- Preheat oven to 450°F with an oven-safe Dutch oven and its lid inside for approximately 30 minutes. Verify cookware temperature rating.
- Transfer dough to a lightly floured surface. Gently fold edges inward and form a loose round loaf without kneading.
- Place loaf on heat-rated parchment paper. Carefully lower into the hot Dutch oven using the parchment and cover with the hot lid.
- Bake covered for 30 minutes.
- Remove lid carefully and continue baking for 10–15 minutes until deeply golden and internal temperature reaches approximately 205–210°F.
- Transfer loaf to a wire rack and cool for at least 30 minutes, preferably longer, before slicing.
Nutrition
Notes
Tried this recipe?
Let us know how it was!Why You'll Love This Easy No-Knead Farmhouse Bread
A Beautiful Crust and Soft, Chewy Center
The biggest reason to make Easy No-Knead Farmhouse Bread is its wonderful combination of textures.
The exterior develops a deeply golden crust with a satisfying crunch. Meanwhile, the inside remains tender, slightly chewy, and full of homemade bread flavor.
Unlike soft sandwich bread, rustic farmhouse bread typically features a firmer crust and a more open crumb.
This texture makes it particularly delicious when you serve it with butter, olive oil, soups, or hearty stews.
The recipe uses a relatively high amount of water compared with the flour. Consequently, the dough feels sticky and loose instead of firm and smooth.
That extra moisture helps produce steam during baking.
As the dough heats, the steam encourages the loaf to expand and contributes to a lighter interior.
The Dutch oven plays an important role because it holds heat and traps moisture around the bread.
During the first 30 minutes, the lid creates a steamy baking environment.
Then, removing the lid allows the crust to brown and become crisp.
The result is a homemade loaf that looks impressive without requiring complicated shaping or kneading.
Although every loaf develops slightly different patterns and air pockets, the rustic appearance adds to its homemade charm.
Simple Ingredients and Minimal Hands-On Work
Another advantage of Easy No-Knead Farmhouse Bread is its short ingredient list.
You only need all-purpose flour, instant yeast, salt, and warm water to make the basic loaf.
Optional honey or sugar adds mild sweetness, while olive oil can provide a slightly softer crumb.
These ingredients are affordable and easy to find in most grocery stores.
The preparation method also saves effort.
Instead of kneading dough for several minutes, you stir everything together with a wooden spoon.
Then, you cover the bowl and allow the dough to rise for approximately two to three hours.
During this time, the flour absorbs moisture and the dough gradually develops structure.
Once the dough becomes puffy and bubbly, you gently shape it into a round loaf.
Finally, the Dutch oven handles the baking process.
This method works particularly well for beginner bread makers because it eliminates several traditional steps.
Additionally, you can enjoy the finished loaf in countless ways.
Serve thick slices with breakfast, prepare rustic sandwiches, or use leftover pieces for toast and croutons.
The recipe makes one generous loaf, making it practical for everyday family meals.
Choosing the Best Ingredients for Farmhouse Bread
Flour, Yeast, and Water for a Reliable Dough
The foundation of Easy No-Knead Farmhouse Bread starts with three cups of all-purpose flour.
All-purpose flour provides enough protein to form a cohesive dough while maintaining a tender interior.
For more consistent results, weigh the flour whenever possible.
Three cups generally equal approximately 375 grams when you spoon the flour into the measuring cup and level it.
Avoid scooping directly from the flour bag because packed flour can lead to dry, dense bread.
Next, you'll need one teaspoon of instant yeast.
Instant yeast works directly with the dry ingredients, so you don't need to activate it separately.
Its fermentation activity helps the dough rise and develop flavor.
Salt also plays an important role.
The recipe uses one and a half teaspoons, which enhance the bread's flavor and help strengthen the dough.
Water provides hydration and allows the flour proteins to develop structure.
Use one and a half cups of warm water, preferably around 100°F to 110°F.
Avoid very hot water because excessive heat can damage the yeast.
The dough should feel sticky and shaggy after mixing.
That's exactly what you want for this rustic no-knead method.
Optional Ingredients That Add Flavor and Tenderness
Although the basic recipe requires only four ingredients, a couple of optional additions can change the finished loaf slightly.
One teaspoon of honey or sugar adds a gentle sweetness.
It can also encourage browning and complement the mild flavor of the flour.
However, you can omit it entirely if you prefer a more traditional rustic loaf.
Olive oil is another optional ingredient.
Adding one tablespoon creates a slightly richer flavor and can soften the interior.
Without olive oil, the bread generally develops a leaner, chewier texture.
Both versions work well.
If you want a classic crusty farmhouse loaf, keep the ingredients simple.
If you prefer a somewhat softer bread for sandwiches, include the olive oil.
You can also experiment with different seasonings after mastering the basic recipe.
For example, dried rosemary adds a fragrant herbal flavor.
Garlic powder creates a savory variation that pairs well with pasta and soups.
You can even sprinkle sesame seeds over the surface before baking.
However, avoid adding too many extras during your first attempt.
Starting with the basic recipe helps you understand how the dough should look, rise, and bake.
Once you feel comfortable with the method, you can adjust the flavors confidently.
How to Make Easy No-Knead Farmhouse Bread Perfectly
Mixing and Rising the Dough Without Kneading
Making Easy No-Knead Farmhouse Bread begins with a large mixing bowl.
Add the flour, salt, and instant yeast.
Stir until you distribute the ingredients evenly.
Next, pour in the warm water and optional honey or sugar.
If you're using olive oil, add it now.
Mix everything with a wooden spoon until the flour absorbs the liquid.
The dough should look rough, sticky, and somewhat uneven.
Unlike traditional kneaded bread dough, it won't form a smooth, elastic ball immediately.
However, you shouldn't see large pockets of dry flour.
Once the ingredients come together, cover the bowl with plastic wrap or a fitted lid.
Leave it in a warm, draft-free location for approximately two to three hours.
During fermentation, the yeast produces gas that expands the dough.
Meanwhile, the flour gradually absorbs moisture and develops structure.
Watch the dough rather than relying entirely on the clock.
A properly risen dough should look roughly doubled in size, airy, and bubbly.
If your kitchen feels cool, the dough may need additional time.
After rising, lightly flour your work surface.
Use a spatula to gently transfer the dough from the bowl.
Avoid punching it down aggressively because you want to preserve some of the trapped gas.
Fold the edges inward a few times to create a rough round shape.
Keep your movements gentle and avoid traditional kneading.
Baking in a Dutch Oven for a Golden Crust
The Dutch oven helps create the crisp crust that makes rustic farmhouse bread so appealing.
Before shaping the dough, preheat your oven to 450°F.
Place an empty oven-safe Dutch oven and its lid inside while the oven heats.
Allow the Dutch oven to become thoroughly hot, generally for approximately 30 minutes.
Check your cookware manufacturer's temperature limits before preheating.
Meanwhile, shape the risen dough into a loose round loaf on a lightly floured surface.
Transfer it onto a piece of parchment paper rated for the baking temperature.
Once the oven and Dutch oven reach the proper temperature, carefully remove the hot pot.
Use oven mitts and place it on a heat-safe surface.
Lower the dough into the pot using the parchment paper.
Cover immediately with the hot lid.
Bake for 30 minutes.
During this stage, moisture from the dough creates steam inside the pot, helping the loaf expand.
After 30 minutes, carefully remove the lid.
Continue baking for another 10 to 15 minutes until the crust becomes deeply golden.
For the most reliable results, check the center with an instant-read thermometer.
The bread should reach approximately 205°F to 210°F.
Once the loaf finishes baking, carefully transfer it to a wire rack.
Allow it to cool for at least 30 minutes, preferably longer, before slicing.
Cooling helps the crumb finish setting and prevents an overly gummy texture.
Serving, Storing, and Troubleshooting Homemade Farmhouse Bread
Delicious Ways to Serve Rustic Farmhouse Bread
Easy No-Knead Farmhouse Bread works beautifully with both sweet and savory foods.
One of the simplest ways to enjoy it is with butter.
Slice a piece of bread, toast it lightly if desired, and spread it with softened butter.
The rich butter complements the crusty exterior and chewy center.
For breakfast, serve toasted slices with honey, strawberry jam, or your favorite fruit preserves.
You can also add peanut butter or almond butter for a more filling option.
For savory meals, this farmhouse bread pairs wonderfully with soups and stews.
Try serving it alongside tomato soup, vegetable soup, creamy chicken soup, or hearty beef stew.
The sturdy crust makes it especially useful for dipping.
You can also prepare rustic sandwiches with grilled chicken, turkey, cheese, fresh vegetables, or egg salad.
For a simple appetizer, cut the bread into thick slices and brush them with olive oil.
Toast until golden, then top with chopped tomatoes, fresh basil, and garlic.
This creates an easy bruschetta-style snack.
Leftover farmhouse bread also makes excellent croutons.
Cut it into cubes, toss with olive oil and seasonings, and bake until crisp.
Another delicious option is homemade French toast.
Because rustic bread has a sturdy texture, thick slices can hold up well when you dip them into an egg-and-milk mixture.
Storage Tips and Common Bread-Making Mistakes
Fresh farmhouse bread tastes best on the day you bake it, especially when the crust remains crisp.
However, proper storage helps preserve its quality.
Once the loaf cools completely, place it in a bread bag or loosely wrapped container.
For the best quality, enjoy it within two to three days at room temperature.
Avoid storing freshly baked bread in a sealed container while it's still warm because trapped moisture can soften the crust.
For longer storage, slice the cooled loaf and freeze individual portions.
Place the slices in a freezer-safe bag and remove excess air.
Frozen farmhouse bread generally maintains good quality for approximately three months.
When you're ready to eat, toast individual slices directly from frozen.
If your bread turns out dense, check whether the yeast was fresh and the dough rose sufficiently.
A cold kitchen can slow fermentation, while excessively hot water can damage yeast.
If the loaf spreads too much, the dough may contain excess moisture or lack sufficient structure.
Accurate flour measurements and gentle shaping can help.
If the crust becomes too dark, shorten the uncovered baking period slightly.
If the center seems gummy, the bread may need more baking time or a longer cooling period.
Finally, remember that rustic no-knead dough naturally feels sticky.
Avoid adding excessive flour simply to make the dough easier to handle.
Ingredients
Yield: 1 loaf | Prep: 10 minutes | Rise: 2–3 hours | Bake: 40–45 minutes | Total: approximately 3–4 hours, plus cooling
- 3 cups (375 g) all-purpose flour
- 1 1/2 teaspoons fine salt
- 1 teaspoon instant yeast
- 1 1/2 cups (360 ml) warm water, approximately 100–110°F
- 1 teaspoon honey or granulated sugar (optional)
- 1 tablespoon olive oil (optional)
- 2 tablespoons all-purpose flour, approximately, for dusting
Instructions
1. Combine the dry ingredients. Add the flour, salt, and instant yeast to a large mixing bowl. Stir until evenly combined.
2. Mix the dough. Pour in the warm water and optional honey or sugar. Add the olive oil if using. Stir with a wooden spoon until a sticky, shaggy dough forms. Do not knead.
3. Allow the first rise. Cover the bowl and let the dough rest in a warm, draft-free place for 2 to 3 hours, or until roughly doubled in size and bubbly.
4. Preheat the oven and Dutch oven. Heat the oven to 450°F. Place an oven-safe Dutch oven with its lid inside and preheat for approximately 30 minutes. Check the cookware's temperature rating.
5. Shape the loaf. Transfer the risen dough onto a lightly floured surface. Gently fold the edges inward and shape it into a loose round loaf without kneading.
6. Prepare for baking. Place the shaped loaf on parchment paper rated for 450°F. Carefully remove the hot Dutch oven and lower the dough into it using the parchment. Cover with the hot lid.
7. Bake covered. Return the Dutch oven to the oven and bake for 30 minutes.
8. Finish uncovered. Carefully remove the lid and continue baking for another 10 to 15 minutes, until the crust becomes deeply golden and the center reaches approximately 205–210°F.
9. Cool and serve. Transfer the bread to a wire rack and allow it to cool for at least 30 minutes, preferably longer, before slicing.
Frequently Asked Questions
1. Can I make Easy No-Knead Farmhouse Bread without a Dutch oven?
Yes. You can bake the dough on a preheated baking stone or heavy baking sheet. Place a separate metal pan on a lower oven rack and carefully add hot water at the beginning of baking to create steam, following safe oven-handling practices. However, a Dutch oven generally makes steam control easier and produces more consistent crust development.
2. Why is my no-knead farmhouse bread dense?
Dense bread often results from insufficient rising, inactive yeast, excessive flour, or low baking temperatures. Make sure the yeast is fresh, measure the flour accurately, and allow the dough to become noticeably puffy before baking. Also, preheat the Dutch oven thoroughly.
3. Can I let no-knead farmhouse bread dough rise overnight?
Yes. You can refrigerate the mixed dough overnight in a covered container with enough room for expansion. The cold temperature slows fermentation and can improve flavor. Before shaping, allow the dough to warm slightly and check that it has risen sufficiently.
4. How do I keep farmhouse bread crusty after baking?
Let the bread cool completely on a wire rack so steam can escape. Avoid sealing the warm loaf in plastic because trapped moisture softens the crust. For a crisp exterior the next day, reheat the bread briefly in a 350°F oven.
5. Can I freeze homemade farmhouse bread?
Absolutely. Allow the loaf to cool completely, then slice it or leave it whole. Wrap tightly and place it in a freezer-safe bag. Freeze for approximately three months for the best quality. Toast frozen slices or thaw the loaf and refresh it briefly in a warm oven.
Conclusion
Easy No-Knead Farmhouse Bread makes rustic homemade bread accessible to anyone who enjoys fresh, comforting food.
With just flour, yeast, salt, and water, you can create a loaf with a crisp golden crust and a wonderfully soft, chewy center.
The simple mixing method eliminates traditional kneading, while the rising period allows the dough to develop texture and flavor.
Meanwhile, the hot Dutch oven creates an excellent baking environment for beautiful crust development.
Whether you serve this farmhouse bread with butter, dip it into soup, or use it for hearty sandwiches, it brings delicious homemade flavor to everyday meals.
For the best results, measure your ingredients carefully, allow the dough to rise fully, and preheat your Dutch oven thoroughly.
Once you experience the aroma and flavor of freshly baked farmhouse bread, this simple recipe may become a regular favorite in your kitchen.
Leave a Reply